 2728
2728
This article assumes you are logged into the Manager Portal as an Office Manager or Site Manager.
If you do not know your login name or password, please click here or contact CallHarbor Support.If you need assistance with updating phone numbers, please contact CallHarbor Support, including:
- Your Name
- Your Extension
- Your Company Name
- Phone numbers to be updated
Enable Timeframes (Time of Day Routing)
Access Phone Numbers
1. Select Inventory

2. By default, Inventory opens to the Phone Numbers sub-tab

All phone numbers associated with your system will be listed.
Add New Phone Number
New phone numbers must be added by CallHarbor Support. To add a new number, contact CallHarbor Support, including:
- Your Name
- Your Company Name
- Phone Number to add*
- Call Routing for phone number
*New phone numbers can be ordered or ported:
For information on Ordering New Numbers, please click here.
For information on Porting Numbers, please click here.
Delete Phone Number
Phone numbers must be deleted by CallHarbor Support. To delete a number, contact CallHarbor Support, including:
- Your Name
- Your Company Name
- Phone Number to delete
Please note that deleting a phone number from inventory releases the number to CallHarbor. If a phone number is released to CallHarbor, the phone number no longer belongs to your business.
Edit Phone Number
1. Click on the phone number to edit, or click on the pencil icon

![]()
2. The Edit <Phone Number> popup window is opened

3. Please refer to the following sections for next steps:
- Treatments
- Enable enhanced voicemail
- Caller ID Prefix
- Enable Date
- Notes
- Enable Timeframes (Time of Day Routing)
4. Once all changes are made, click Save. Cancel will disregard the changes.
![]()
Treatments
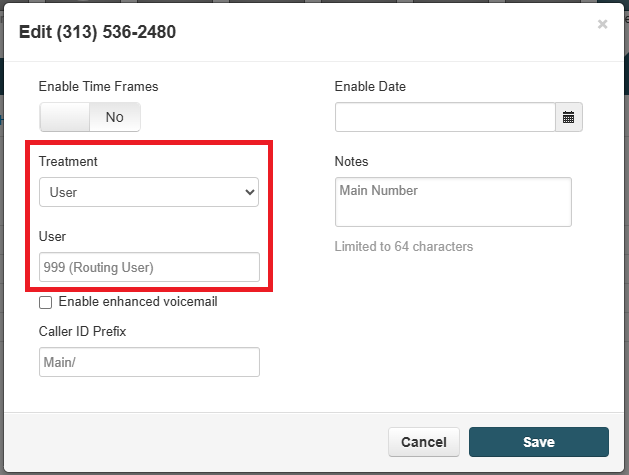
Treatments determine how the phone number is routed in the system.
Available Number

A phone number set to available number will not have routing in the system. If called, a system "We're sorry you have reached a number that has been disconnected or is not currently in service" message will play before hanging up.
User
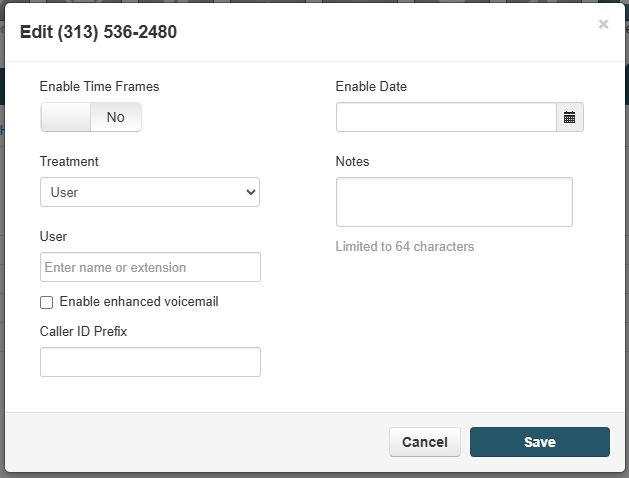
To set your phone number to go to a user:
1. Select User from the treatment dropdown menu
2. Enter the extension for the user in the User textbox

Conference

CallHarbor uses a third-party conferencing software. For assistance in setting a conference on a phone number, please contact CallHarbor Support, including:
- Your Name
- Your Extension
- Your Company Name
- The phone number to be edited
Call Queue
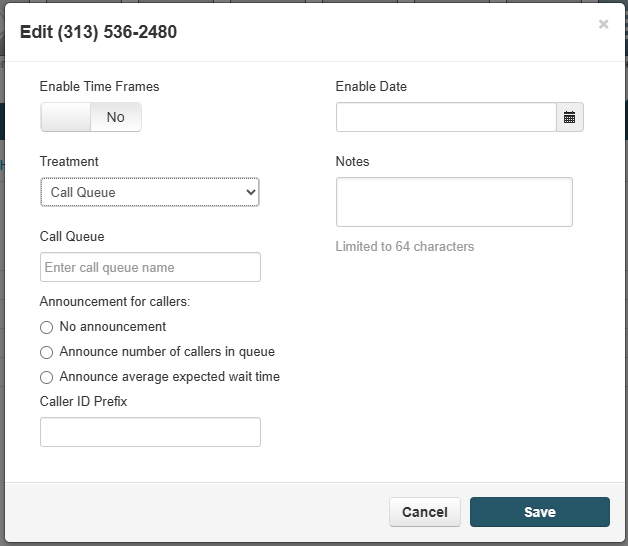
To set your phone number to go to a Call Queue:
1. Select Call Queue from the treatment dropdown menu
2. Enter the extension for the call queue in the Call Queue textbox
3. Select Announcements for Callers, only one option can be selected:
- No announcement - no announcement is played when the caller connects to the queue
- Announce number of callers in queue - the number of callers ahead of the caller is announced when the caller connects to the queue
- Announce average expected wait time - the average wait time for the call queue is announced when the caller connects to the queue

Voicemail

To set your phone number to go to a voicemail box:
1. Select voicemail from the treatment dropdown menu
2. Enter the extension for the user in the Voicemail textbox

Auto Attendant
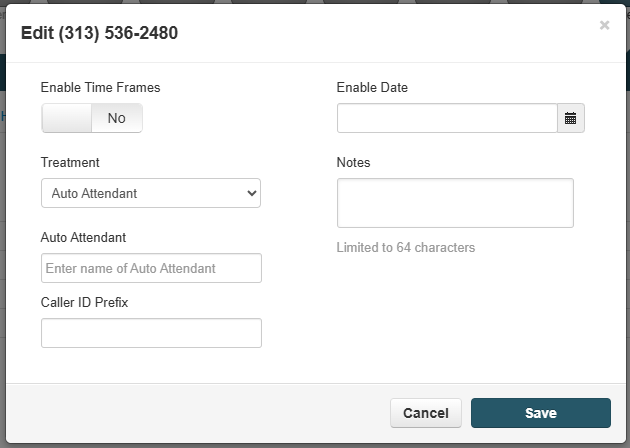
To set your phone number to go to an auto attendant:
1. Select Auto Attendant from the treatment dropdown menu
2. Enter the extension for the auto attendant in the Auto Attendant textbox

PSTN Number
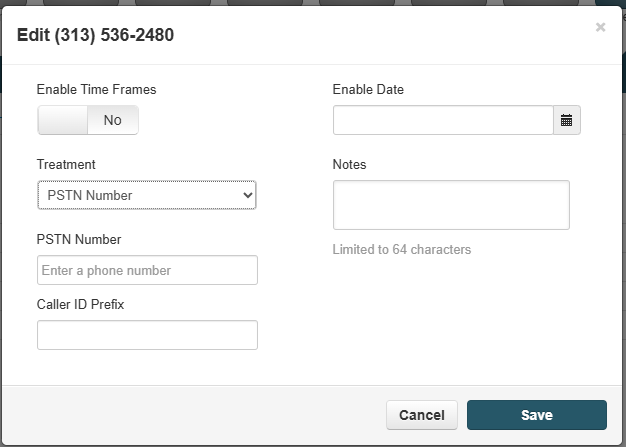
A PSTN Number is a phone number to forward to. PSTN means Public Switched Telephone Network
To set your phone number to forward to another phone number:
1. Select PSTN Number from the treatment dropdown menu
2. Enter the phone number in the PSTN Number textbox

Enable enhanced voicemail

Enhanced Voicemail gives the caller the option to dial another extension or leave a voicemail after listening to a user's voicemail greeting.
If unchecked, the caller will not have the option to dial another extension after listening to the user's voicemail greeting, only the option to leave a voicemail message.
Caller ID Prefix
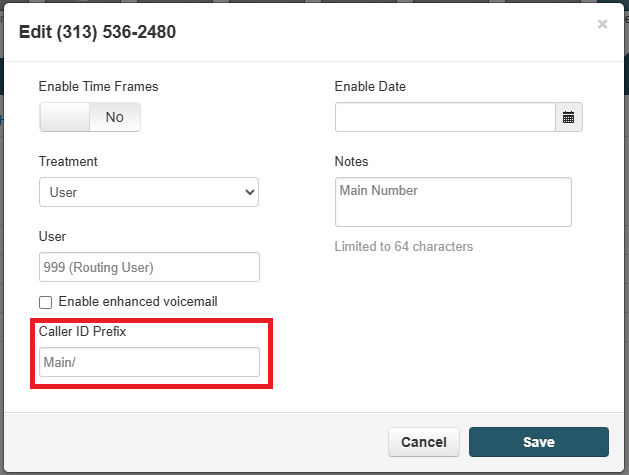
A caller ID prefix is a tag added to the front of a caller's caller ID. They can be used to track incoming calls.
For example, you have two numbers that follow the same call routing, but for different locations. Each phone number can have the location added as a caller ID prefix, and the users answering the calls will know which location to answer as.
Enable Date

An enable date may be set on a phone number if it was ported to CallHarbor. An enable date is not necessary.
If an enable date is set, the phone number will be considered disabled until the date set. For example, if a phone number is set to enable on 03/24/25, the phone number will be disabled before 03/24/25.
Notes

Notes are used for organization, such as labeling different location main numbers
Enable Timeframes (Time of Day Routing)
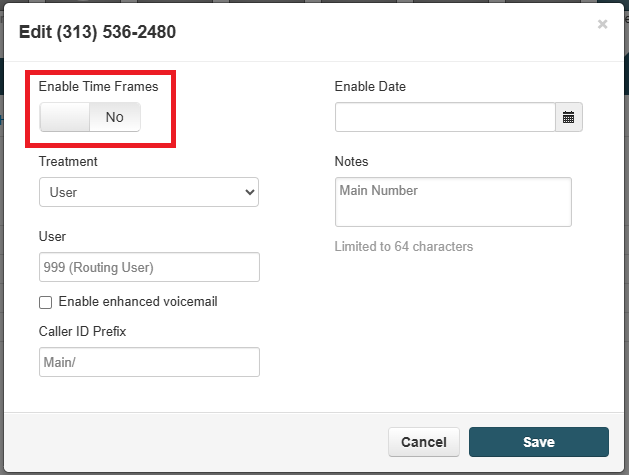
Phone Numbers can have routing that is determined by the time of day. If multiple phone numbers will follow the same time of day routing, we recommend using a Routing User instead. This will allow the call routing to be held in one place but affect multiple numbers. If the call routing is set up on the number itself, the updates will need to be made to all numbers following the call routing.
To set your phone number to use Time of Day:
1. Toggle Enable Time Frames to Yes

2. The popup window is updated to include Time frames, with Default already added. Default is a catch-all time frame that will apply when no other time frames apply.
Default is usually used as the after-hours rule

3. Set the treatment for Default. The treatment set here will apply when no other time frames apply based on the time of day

4. Add additional time frames by selecting the Time frame from the drop down

5. Click the Plus icon
![]()
6. Set the treatment for the new time frame

7. Repeat steps 4 through 6 for all time frames needed

8. Reorder the time frames as needed. The system will go top to bottom and follow the first active time frame. Default is always active, so if it is on top then only the default time frame will work.

9. Click Save. Cancel will disregard the changes.
![]()


