
 929
929
Contact CallHarbor Support at 313-263-3663 before you start this process. This process should not be completed without the assistance of a CallHarbor Support Technician. We will walk you through this process step by step. Performing these steps without engaging CallHarbor Support will cause faxes to fail. We must make internal changes on our end as well.
Old Fax Bridge
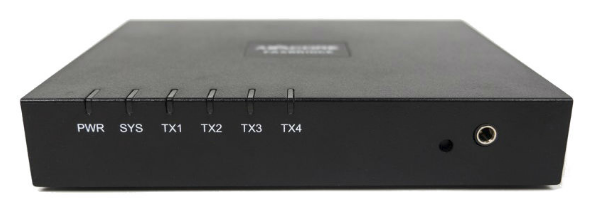
Fax Bridge Front

Fax Bridge Back
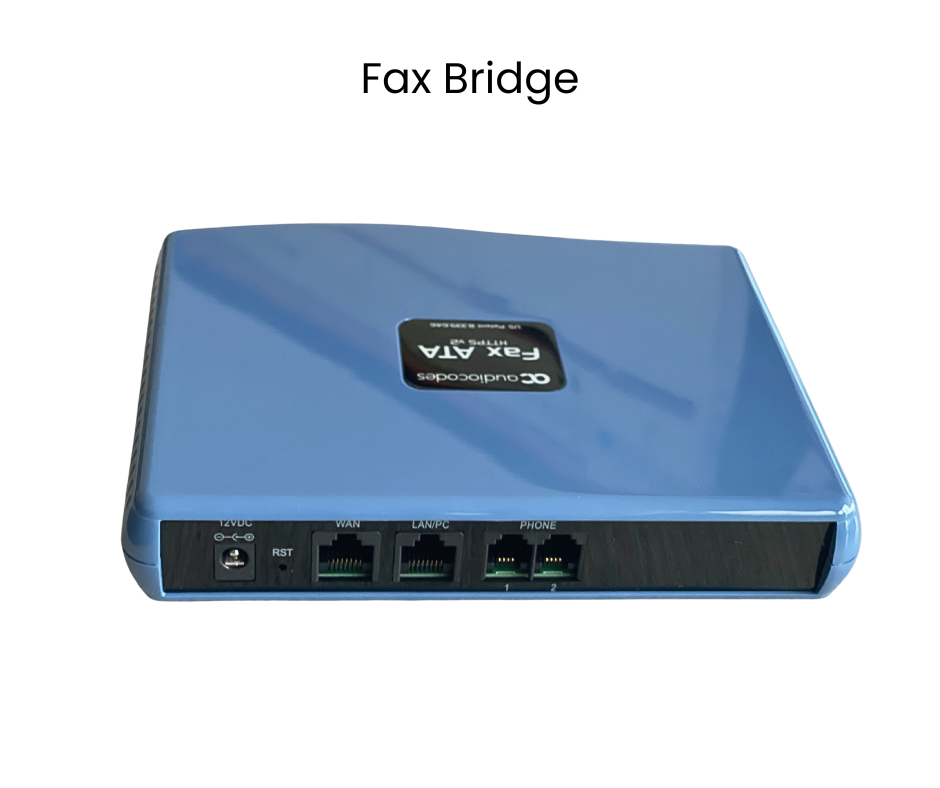
New Fax Bridge
1. Locate your current fax bridge. It will be plugged into the side or back of your printer or fax machine.
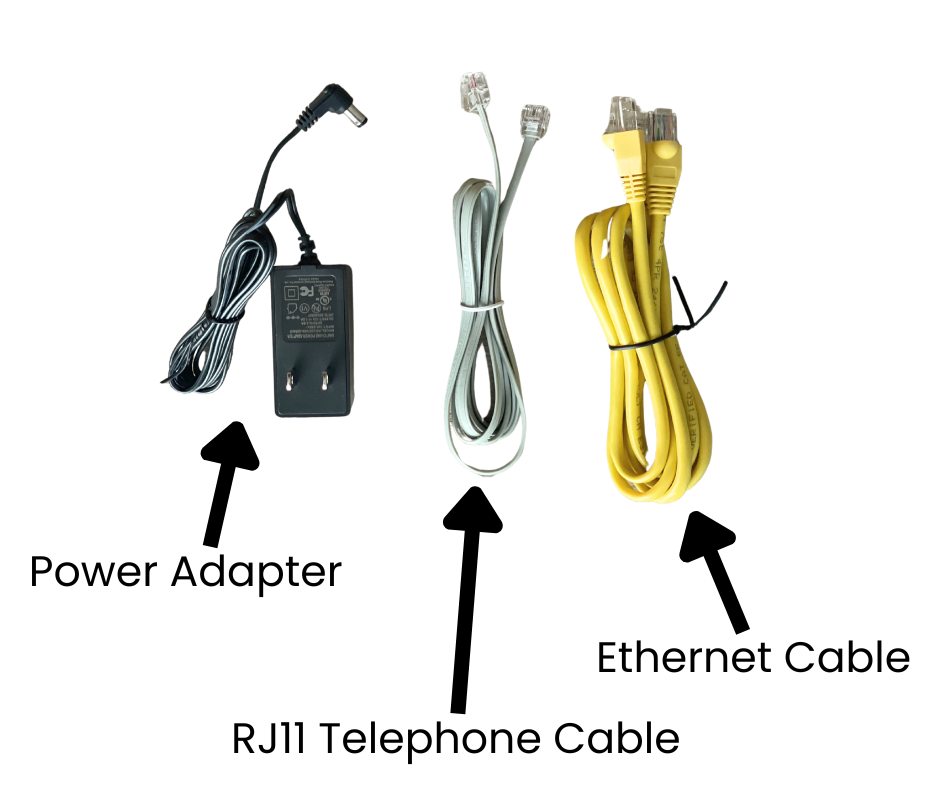
2. There will be 3 cords connected to the fax bridge: the power cord, the Ethernet cable, and the RJ11 telephone cable.
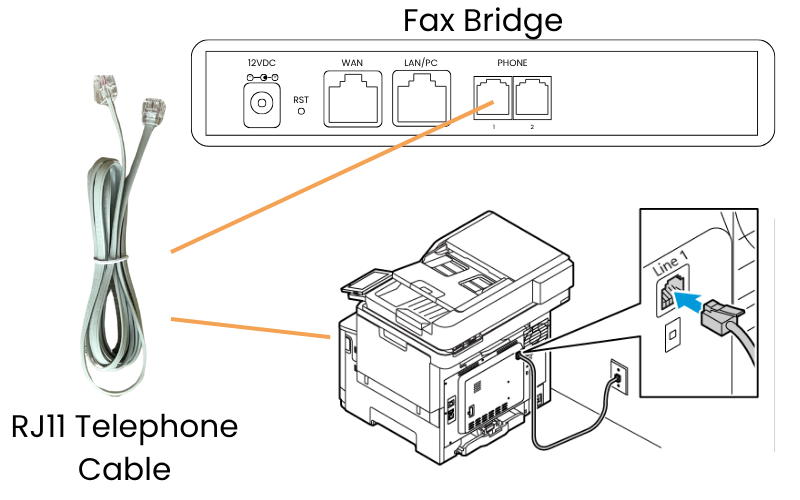
3. Find the RJ11 cable. It will be plugged into the “Fax” port on the old fax bridge. Unplug the RJ11 cable from the old fax bridge. (Do not unplug it from the printer/fax machine) Take the end you just unplugged and plug it into the “Phone 1” port on your new fax bridge.
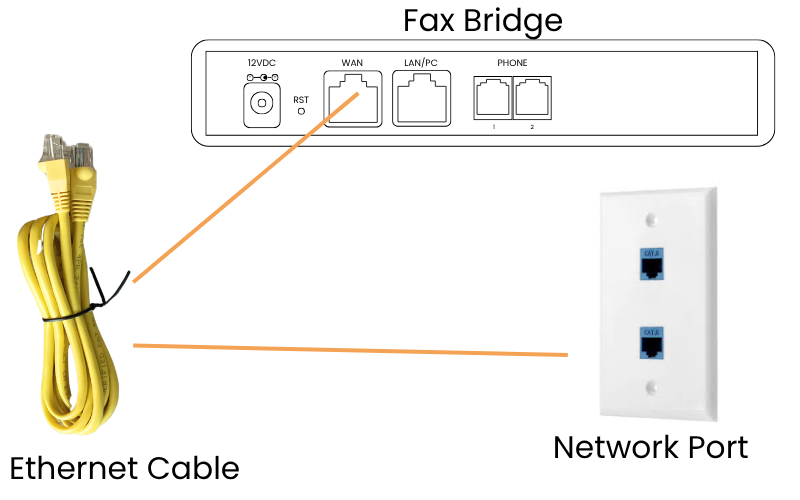
4. Find the ethernet cable. It will be plugged into the “WAN” port on the old fax bridge. Unplug the ethernet cable from the old fax bridge. (Do not unplug it from the network port or switch!) Take the end you just unplugged, and plug it into the “WAN” port on the new fax bridge.
5. Find the power cord. It will be plugged into the “PWR” port on the fax bridge. The other end will be plugged into a power outlet. Unplug the power cord from the fax bridge and the wall outlet.
Set the power adapter you just unplugged to the side. (You will ship this back to CallHarbor with the included return slip.)
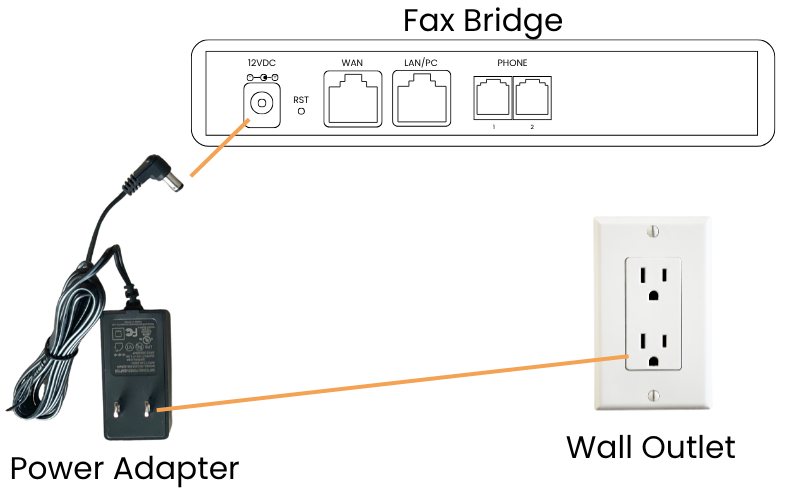
6. Now, find the new power adapter that came with your new fax bridge. Make sure you have the new power adapter before proceeding. Plug one end into the “12VDC” port on the new fax bridge. Plug the other end into a wall power outlet or power strip.
Your new fax bridge is now installed. Please ship back your old fax bridge and cables to CallHarbor with the included return slip.

