
 1991
1991
Download CallHarborUC Desktop App
Download CallHarborUC Desktop App
1. Go to https://callharbor.com/apps/
2. Scroll down to Other Downloads
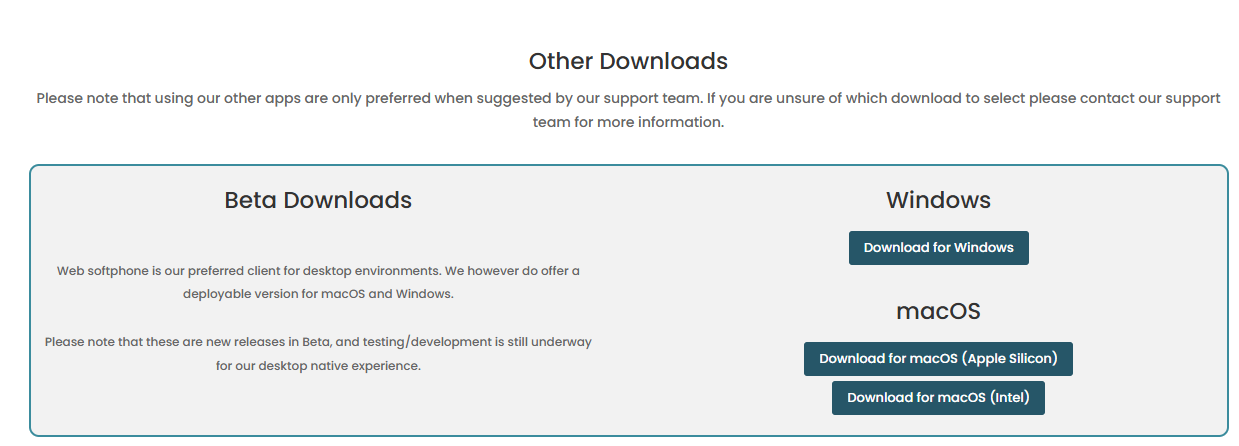
3. Download the correct version based on the os your computer is running. To learn about checking which macOS to download, please click here.
Login
The CallHarborUC desktop app uses the same login information as the CallHarbor Portal, Mobile App, and Web Softphone. If you do not know your login name or password, please click here or contact CallHarbor Support.
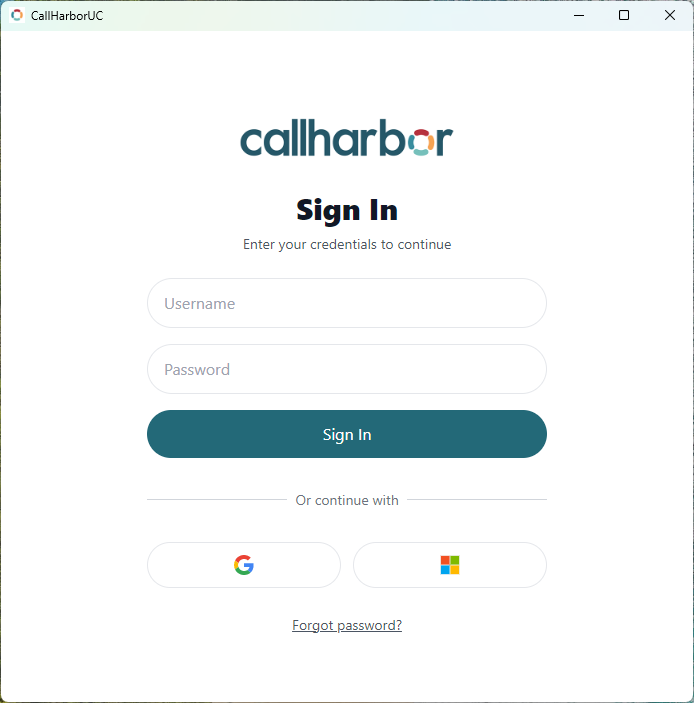
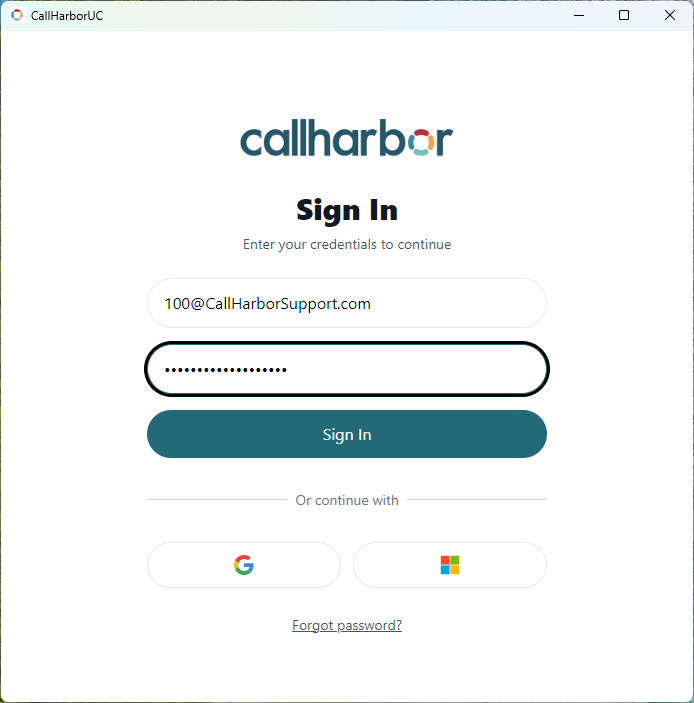
1. Enter your username and password, then click Sign In
2. If this is your first time logging in, please continue to the Logging in for the First Time section
3. After clicking Sign In, the application will authenticate and download

4. A Registration succeeded pop-up should appear across the bottom of the window.
- If registration fails, ensure you have a microphone connected to your computer, and try logging out and logging in again.
- If registration continues to fail, please contact CallHarbor Support

5. Once logged in, you will be brought to the Keypad tab by default

Logging in for the First Time
If this is your first time logging in, the application will ask if you would like to set CallHarborUC as your default calling application. The default calling application is the application used to complete calls when clicking telephone number links on your computer. It is not required to set CallHarborUC as the default calling application; however, if the default calling application is set to another app and click-to-dial is used, the other application will open instead of CallHarborUC. If you are not updating the default application, skip to step 7.
1. To set the default calling application, click Settings
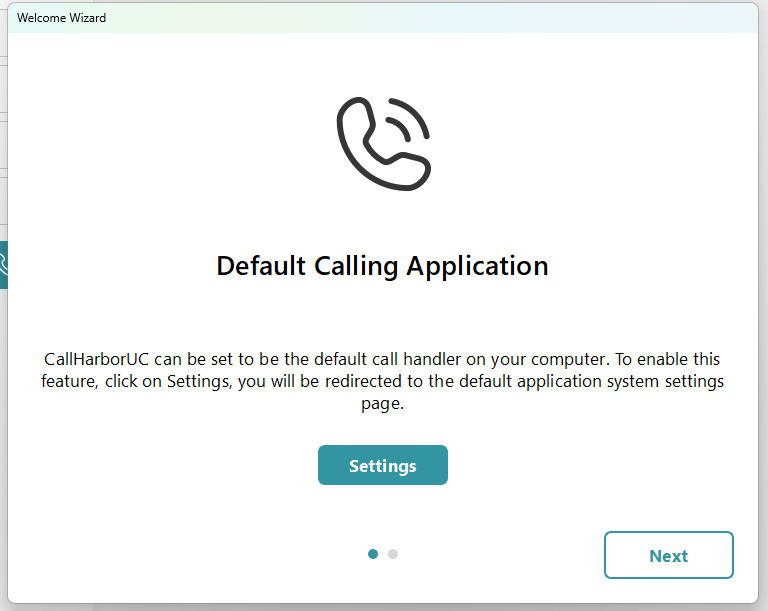
2. This will open the settings window to Default Apps
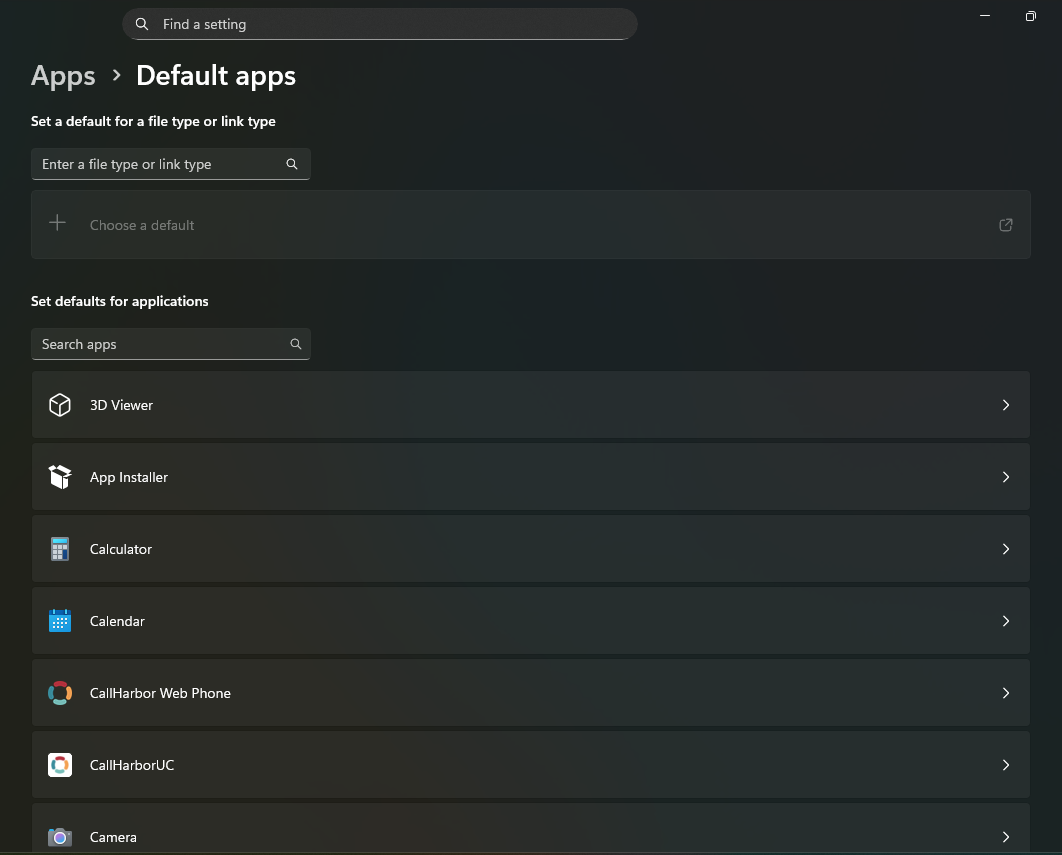
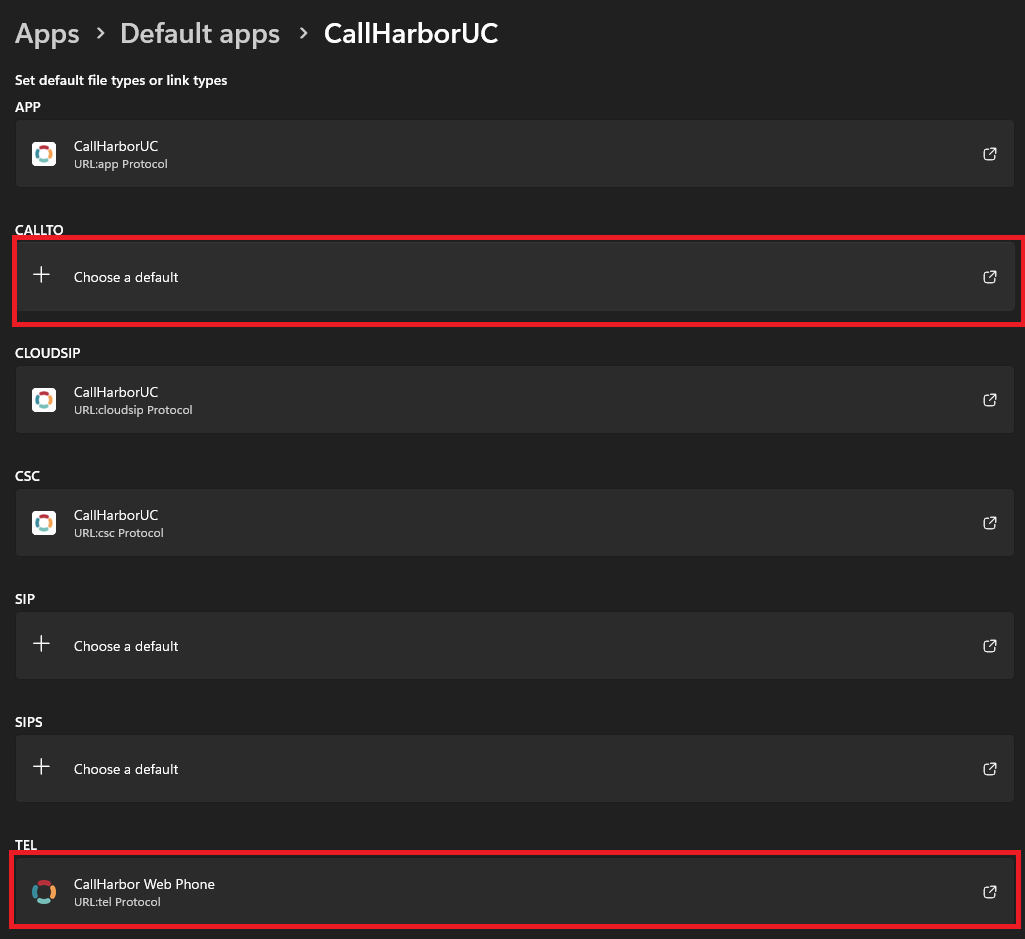
3. Locate and click CallHarborUC
![]()
4. This will open a list of all available telephone number link types. If you would like CallHarborUC to be used on every telephone link available for click-to-dial, set each link type to CallHarborUC. Click "+Choose a Default" or on the application already selected for the link type.
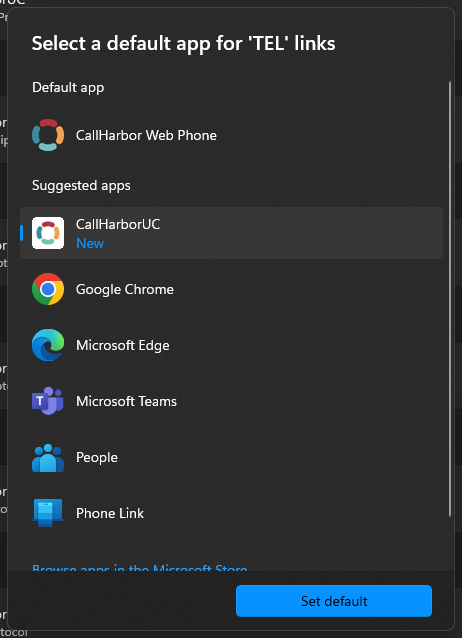
5. This will open a selection pop-up window, select CallHarborUC, then click "Set default"
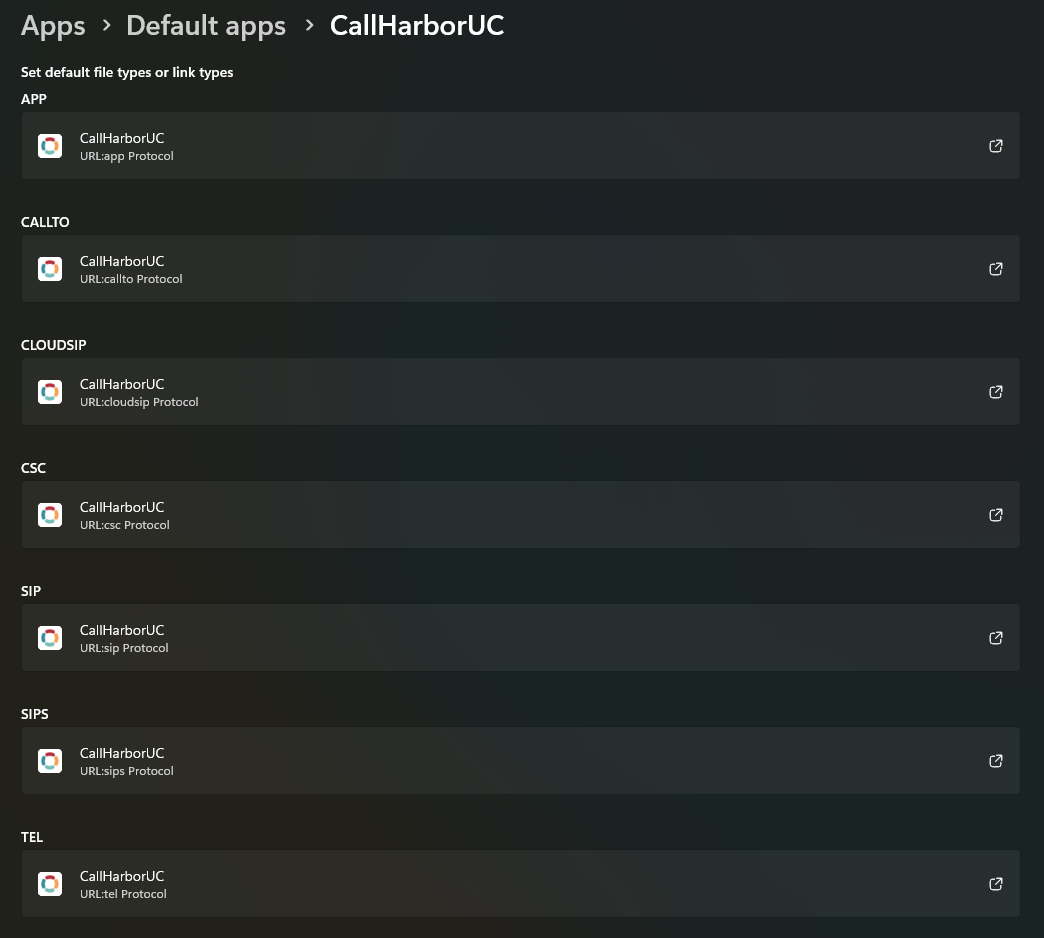
6. Repeat for all desired link types
7. Once all default apps are updated, click Next, then Finish
8. Once logged in, you will be brought to the Keypad tab by default
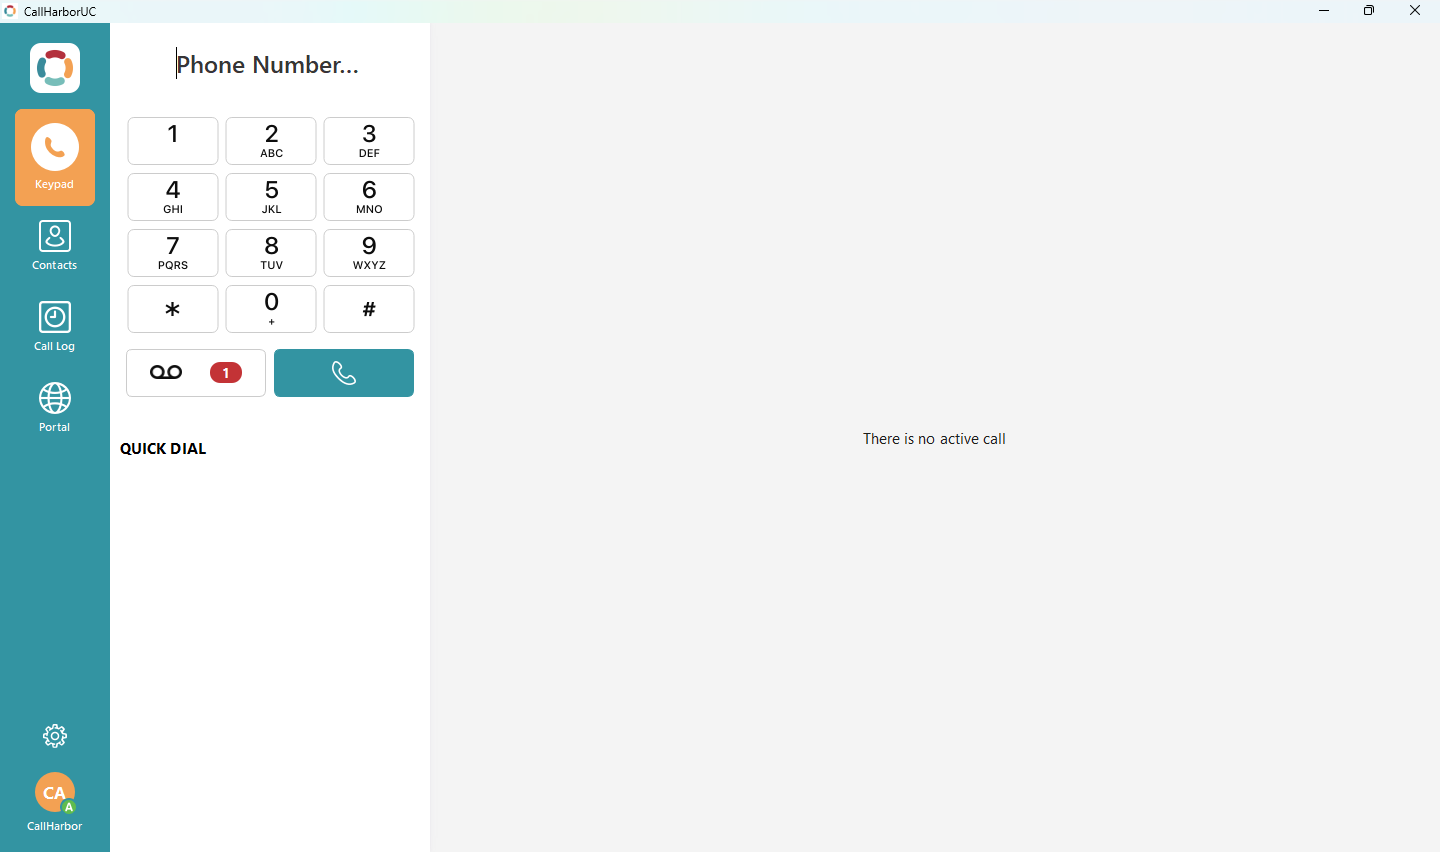
Overview
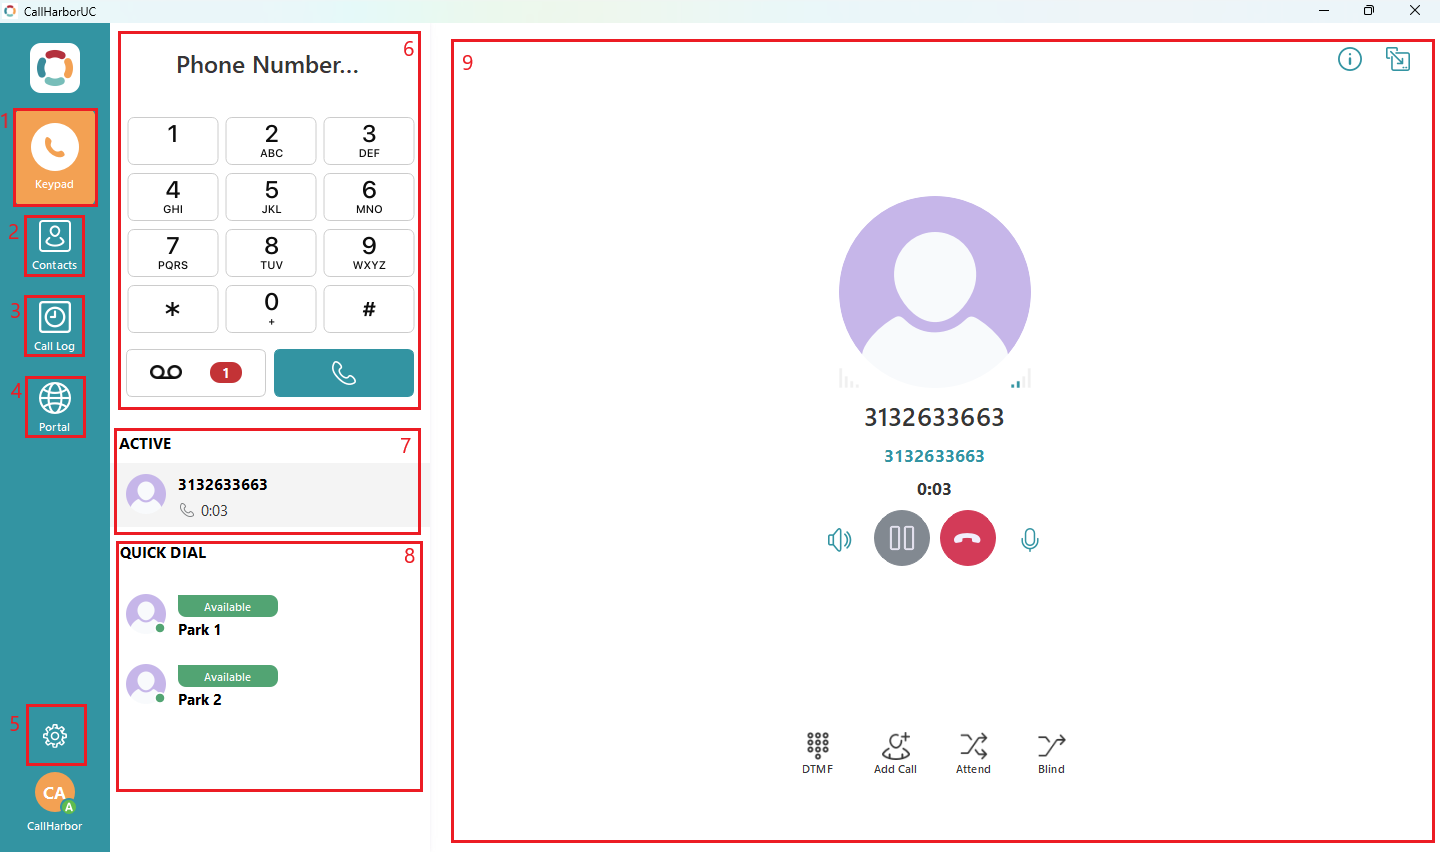
Keypad
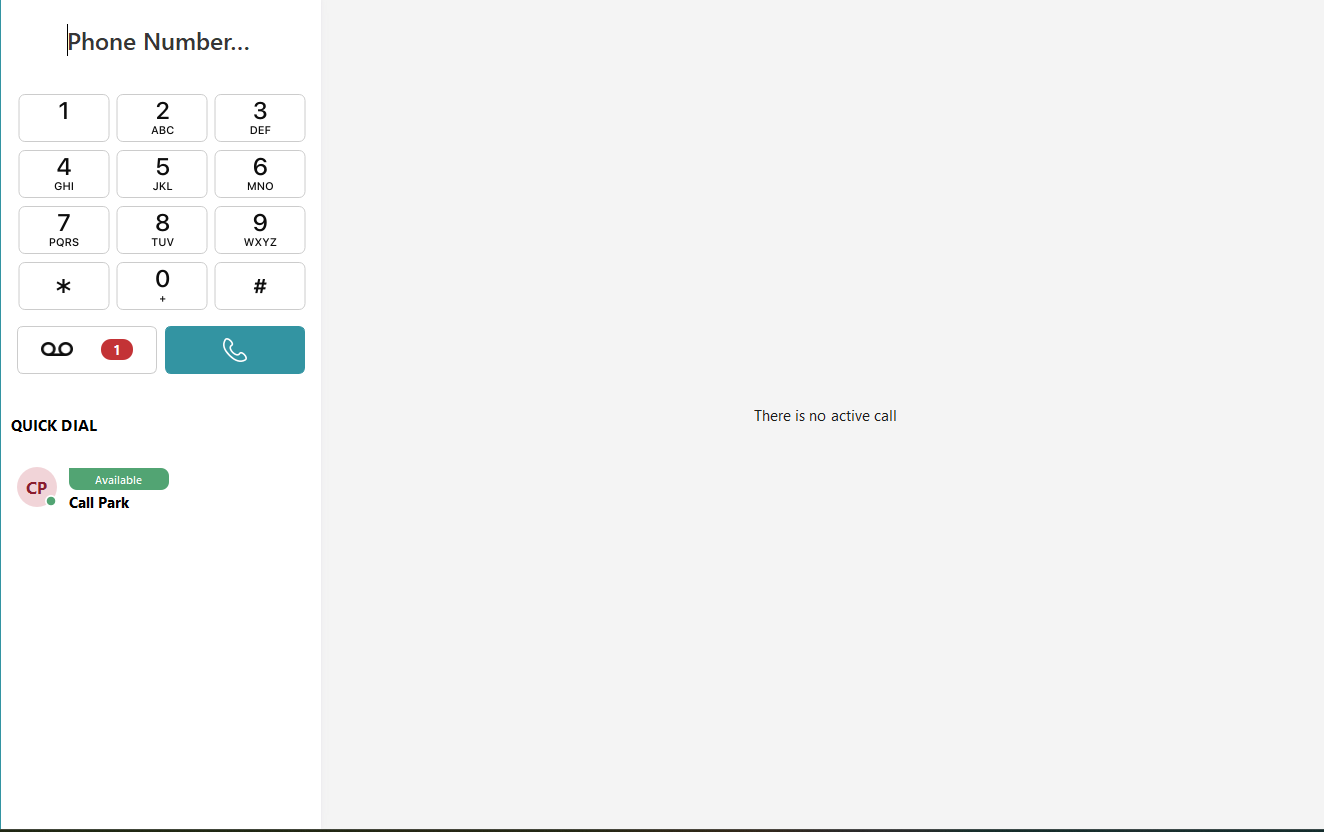
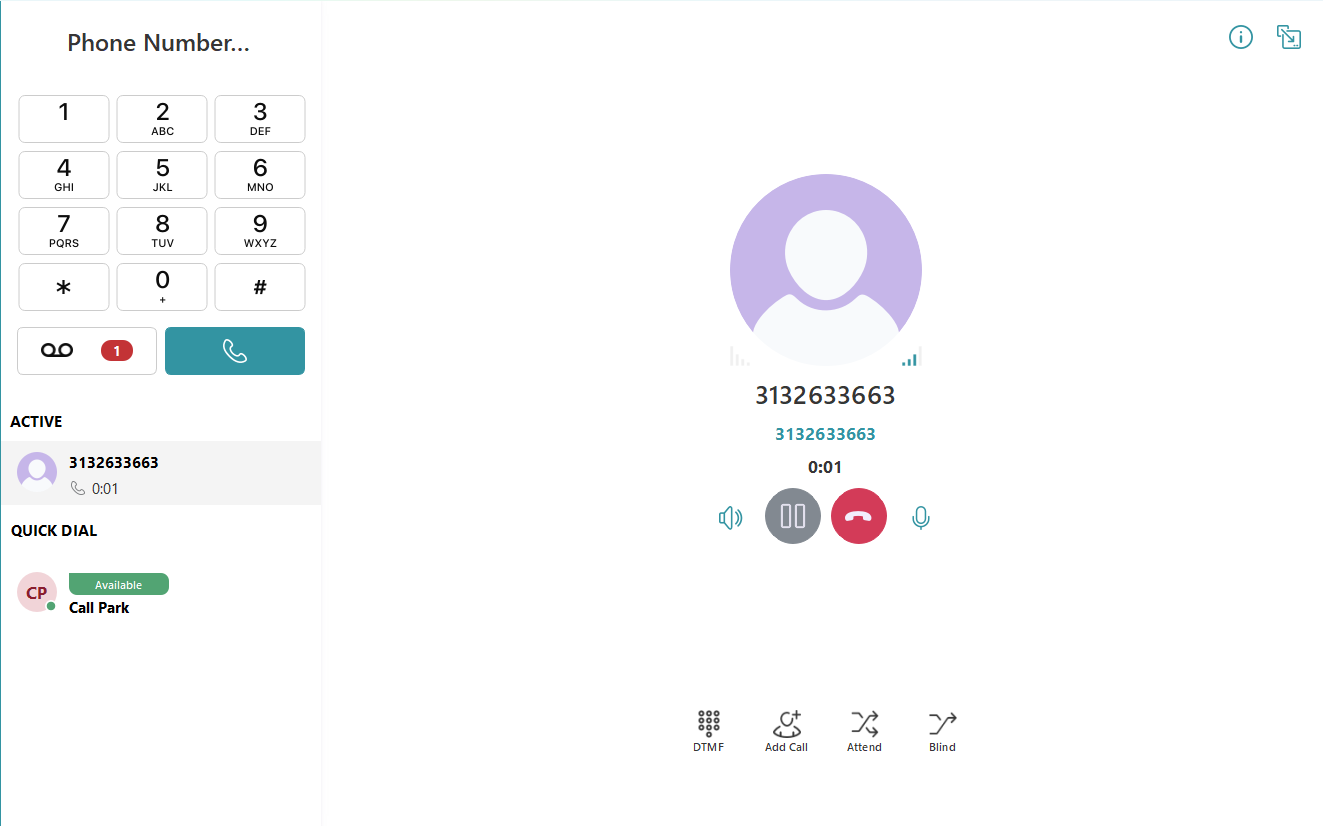
By default, the application will open to the Keypad tab. The Keypad tab contains the Dial Pad and Quick Dial contacts. If an active call is occurring, the Active Call List and Call Display will also appear in the Keypad tab.
No Active Call
Active Call
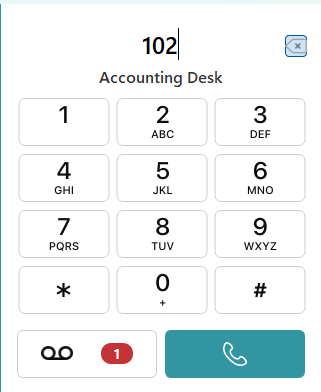
Dial Pad
The Dial Pad is used to dial phone numbers or extensions to complete calls.

The phone number can be entered by typing the number on your keyboard, as long as the Phone Number field is active, indicated by the text cursor.

Phone numbers can also be typed by clicking on the numbers within the dial pad
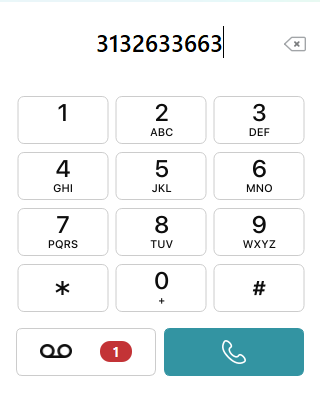
Start the call by either clicking the phone icon or pressing Enter

The Dial Pad also includes a Voicemail button. Clicking this will dial 5001, connecting to the Voicemail System. Please refer to the DTMF section for entering your voicemail PIN.
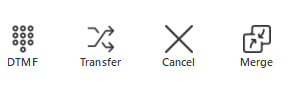
Call Display
The Call Display will appear once an outgoing call is made or an incoming call is answered.
- Your Audio Indicator
- The Caller/Called Audio Indicator
- Speaker
- Hold
- End Call
- Mute
- DTMF
- Add Call
- Attended Transfer
- Blind Transfer
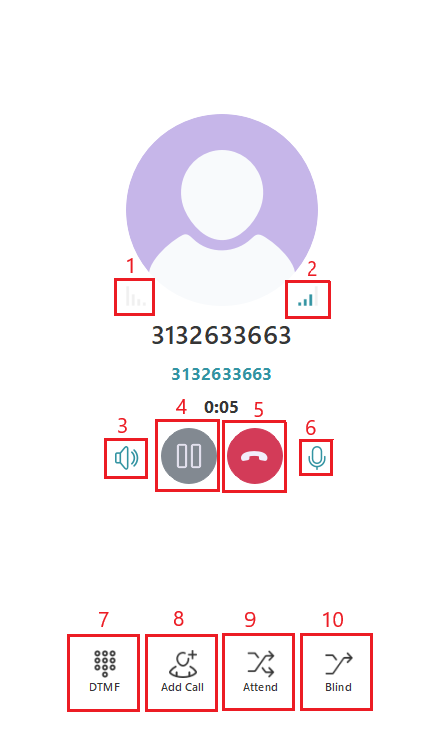
Your Audio Indicator
Your Audio Indicator will always be located on the left, regardless of whether it's an incoming or outgoing call. The Indicator will be grey if no audio is detected, and will indicate green when audio is detected. The volume of the audio will also be shown based on the number of bars highlighted green.

The Caller/Called Audio Indicator
The Caller/Called Audio Indicator will always be located on the right, regardless of whether it's an incoming or outgoing call. The Indicator will be grey if no audio is detected, and will indicate green when audio is detected. The volume of the audio will also be shown based on the number of bars highlighted green.
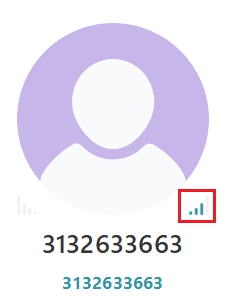
Speaker
The Speaker icon allows you to change the speaker and/or microphone while on the call. Please keep in mind that this updates the sound settings for the application, not just the call. The sound settings will need to be updated again if the speaker/microphone change was just for one call.
Click the speaker icon then click the new Speaker and/or microphone you would like to use.
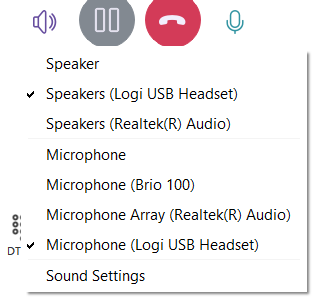
Hold
To place a call on hold, click the Pause button. The call length duration will update to "On Hold".

To resume the call, click the Play button.
End Call
To end a call, click the Red phone icon.

Mute
Click the microphone to mute and unmute.
![]()
When muted, the microphone icon will update to display a slash \ with a "Mic Muted" pop-up across the top of the application
![]()

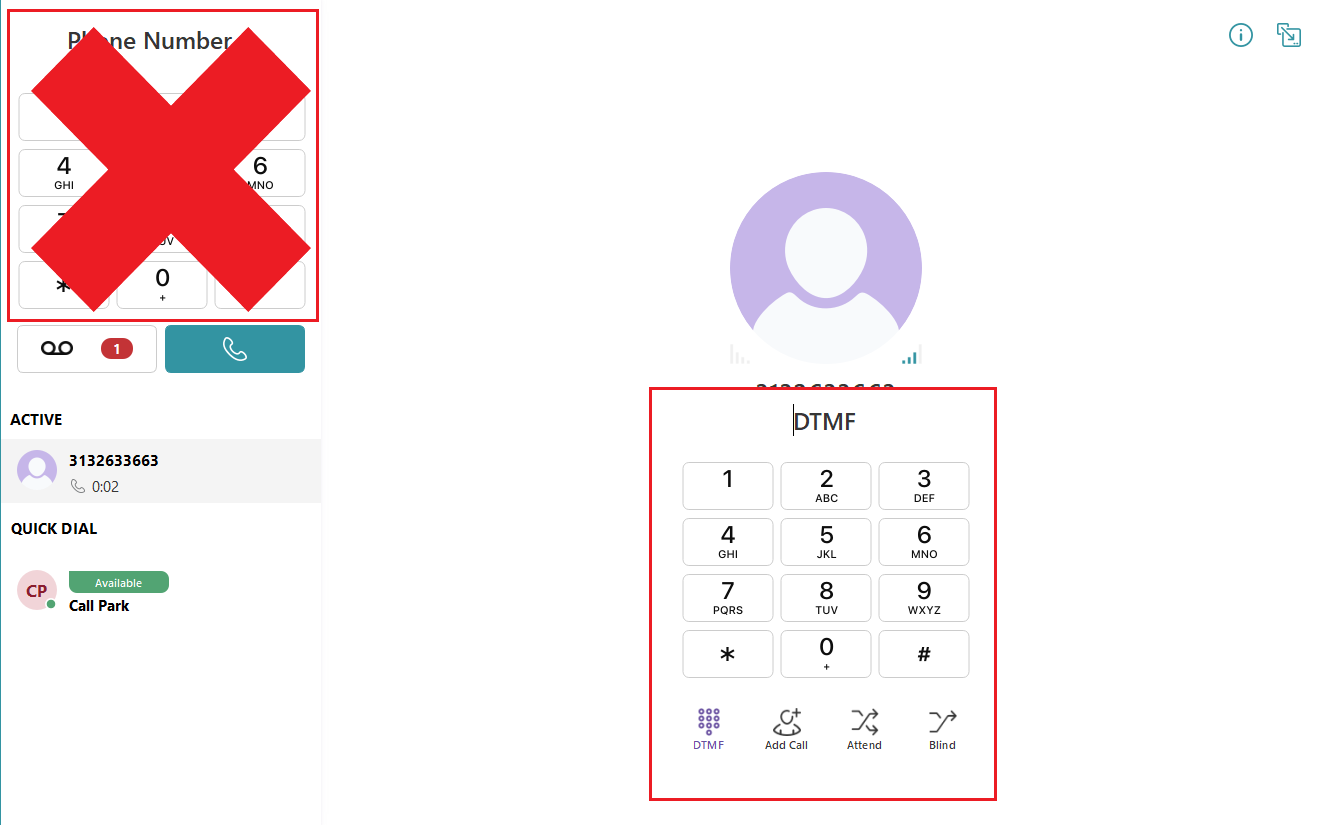
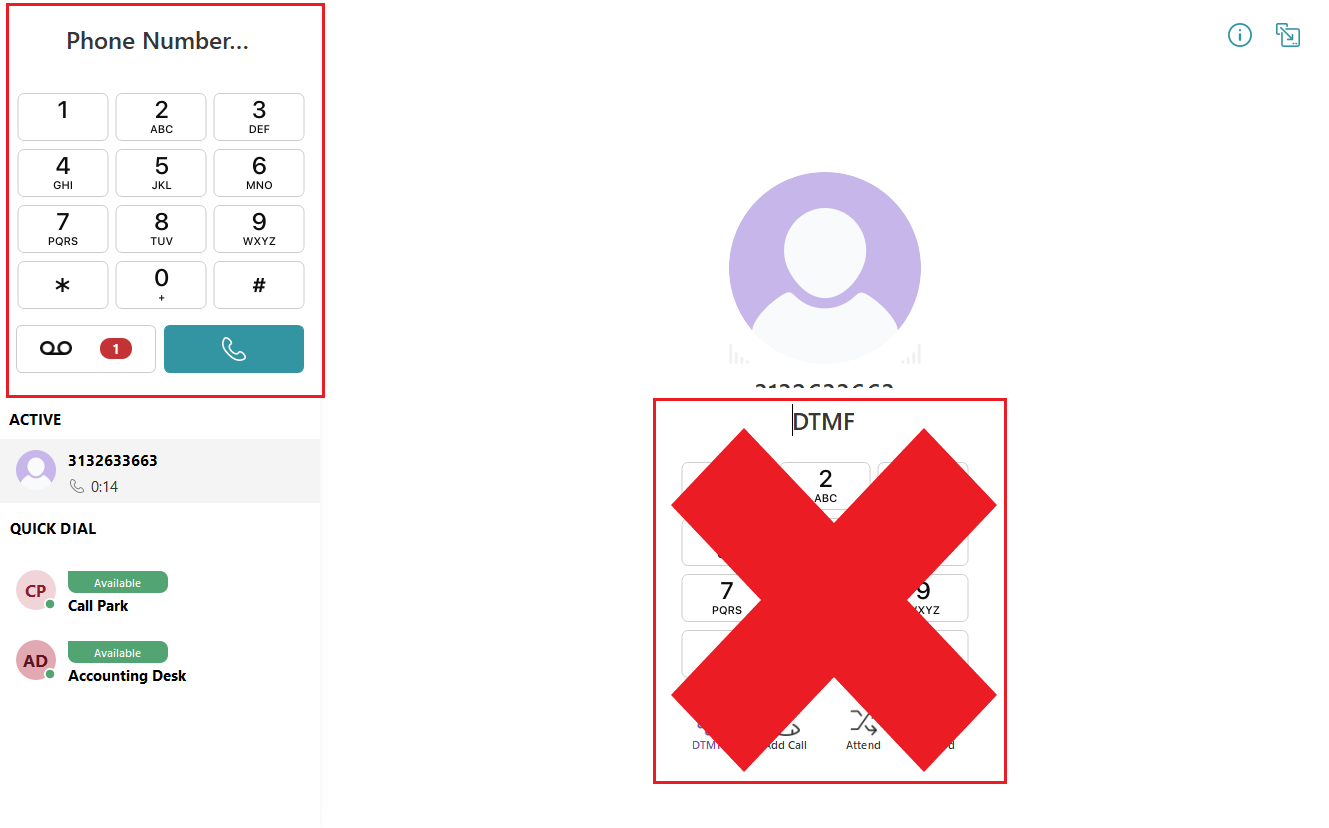
DTMF
DTMF allows you to type numbers in a call, such as a voicemail PIN, or a selection from a list of options in an auto attendant. Click DTMF to open the in-call keypad.

The DTMF keypad will appear within the Call Display.
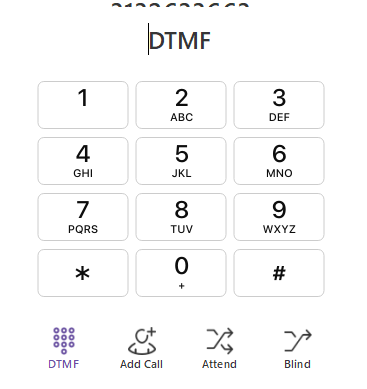
Typing or clicking within the Dial Pad will not work for entering numbers in a call. The DTMF keypad must be used.
Add a Call
1. To add a call, click Add Call

2. A 'Pick contact or use dialpad' pop-up will show up across the top of the application.

3. Select a contact from Quick Dial, or enter the phone number to add to the call in the Dial Pad, and click Call.
The Dial Pad must be used. DTMF keypad will not work for adding the call.
3. The first call will be placed on Hold, with the second call becoming the active call in the Active Call List
4. Once the second call is answered, there is an option to merge the calls. Click Merge.
![]()
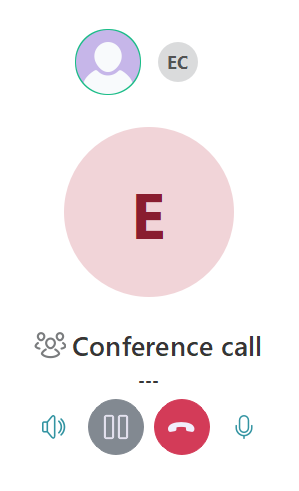
5. The Active Call List will update to display Conference Call instead of the two separate calls
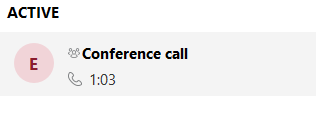
The Call display will also update to include all participants. Audio from each participant is indicated with a green circle.
6. If you click end on a conference call before there is only 1 participant (other than you) left, the conference call will continue with the remaining participants. It is recommended to have participants end the call on their end, or to split the calls.
7. To split and end the conference call, click Split.
![]()
8. Select a call to be the active call.
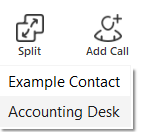
9. The call not selected will be placed on hold.
Transfer
There are two types of transfers that can be completed: Attended Transfers and Blind Transfers. An attended transfer allows for communication between the extensions before the transfer is completed. A blind transfer sends the caller to the new extension without any interaction between the person transferring the call and the extension receiving the transfer. Transfers do not need to be to extensions only; a phone number can be entered when completing a transfer.
Attended Transfers will allow communication before the transfer is completed. An attended transfer is best used when:
- Relaying information about the call
- Ensuring the transfer will be answered and not sent to voicemail
1. To complete an Attended Transfer, click Attend.

2. A 'Please select call transfer target' pop-up will appear across the top of the application.
![]()
3. Select a contact from Quick Dial, or enter the phone number to transfer to on the Dial Pad, and click Call.
The Dial Pad must be used. DTMF will not work for transferring the call.
4. The phone number entered will be called. Once answered, the call display will update to include a Transfer button. When you are ready to complete the transfer, click Transfer.
If the transfer will not be completed, click Cancel or End Call.
- If you click cancel, the transfer will not be completed, but the call with the person you attempted to transfer to will not end.
- If you click End Call, you will be brought back to the call that was to be transferred, with the caller on hold.
5. A 'Transfer completed' pop-up will appear once the transfer is completed.

A Blind transfer will transfer the call immediately once a contact is selected or entered on the dial pad. Blind transfers are best used when:
- No information about the call needs to be relayed
- The transfer can be answered by voicemail
1. To complete a Blind Transfer, click Blind
![]()
2. A 'Please select call transfer target' pop-up will appear across the top of the application.
![]()
3. Select a contact from Quick Dial, or enter the phone number to transfer to on the Dial Pad, and click Call.
The Dial Pad must be used. DTMF will not work for transferring the call.
4. After clicking the contact or Call button, the call is transferred to the phone number entered. A 'Transfer completed' pop-up will appear once the transfer is completed.

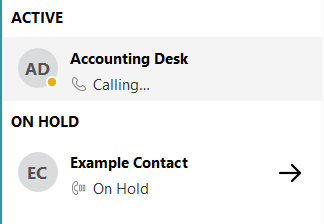
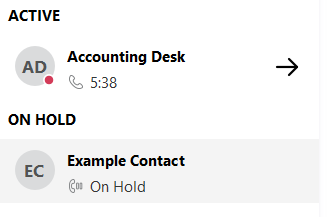
Active Call List
The Active Call List only appears when active calls are occurring. If you are not on a call, the Active Call List will not show in the Keypad tab. The Active Call List will indicate which call you are actively connected to, along with any additional calls that are On Hold.
- Clicking the Arrow will update which call is displayed in the Call Display. Clicking the arrow will not place the active call on hold, nor remove the On Hold call from Hold. The arrow will only update which call is displayed.
- To switch the active call, click the arrow to update the Call Display, then click the Play button to remove the caller from being On Hold.

Move Call from Another Device
If you are on a call on another CallHarbor device, such as the CallHarborUC mobile app or a physical desk phone, you can move the call to your desktop app by dialing *88
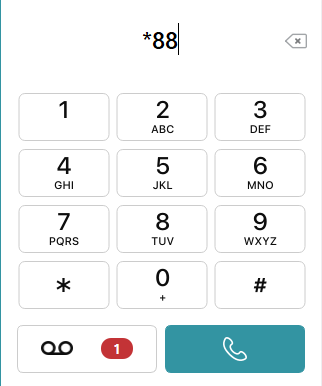
The caller will not be placed on hold during the move from one device to another. After dialing *88, the desktop app will update to display the caller ID of the call pulled.
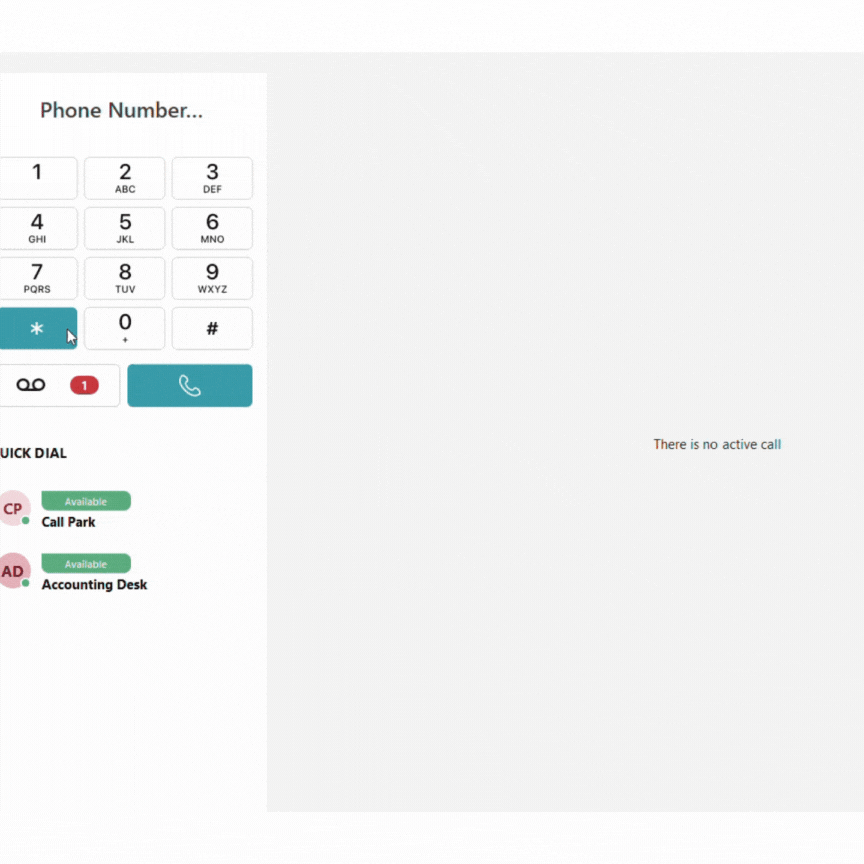
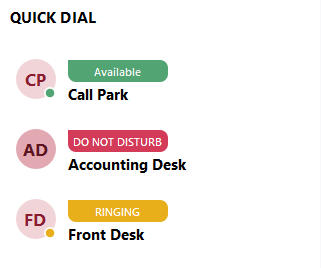
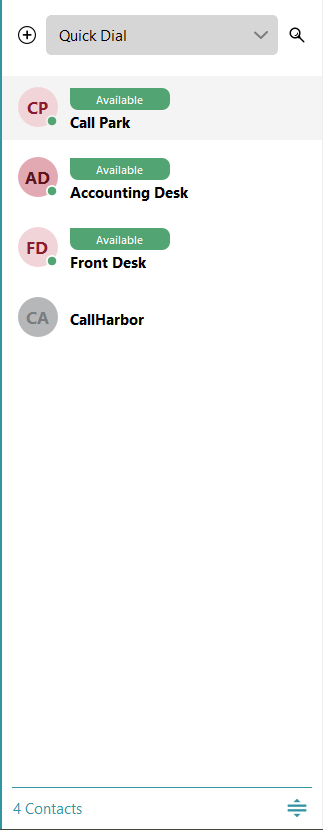
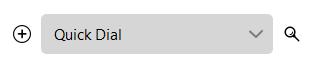
Quick Dial
Quick Dial will display any contacts that have been added or pinned, creating speed dials within the desktop application. This allows for outgoing calls and transfers by clicking the contact. Extensions that are pinned can also be set to display current availability through the use of BLFs. Contacts are added to Quick Dial within the Contacts tab. Please click here to learn how to add a contact to Quick Dial.
Available (Green)
Ringing (Orange)
On Call (Red)
Do Not Disturb (Red).

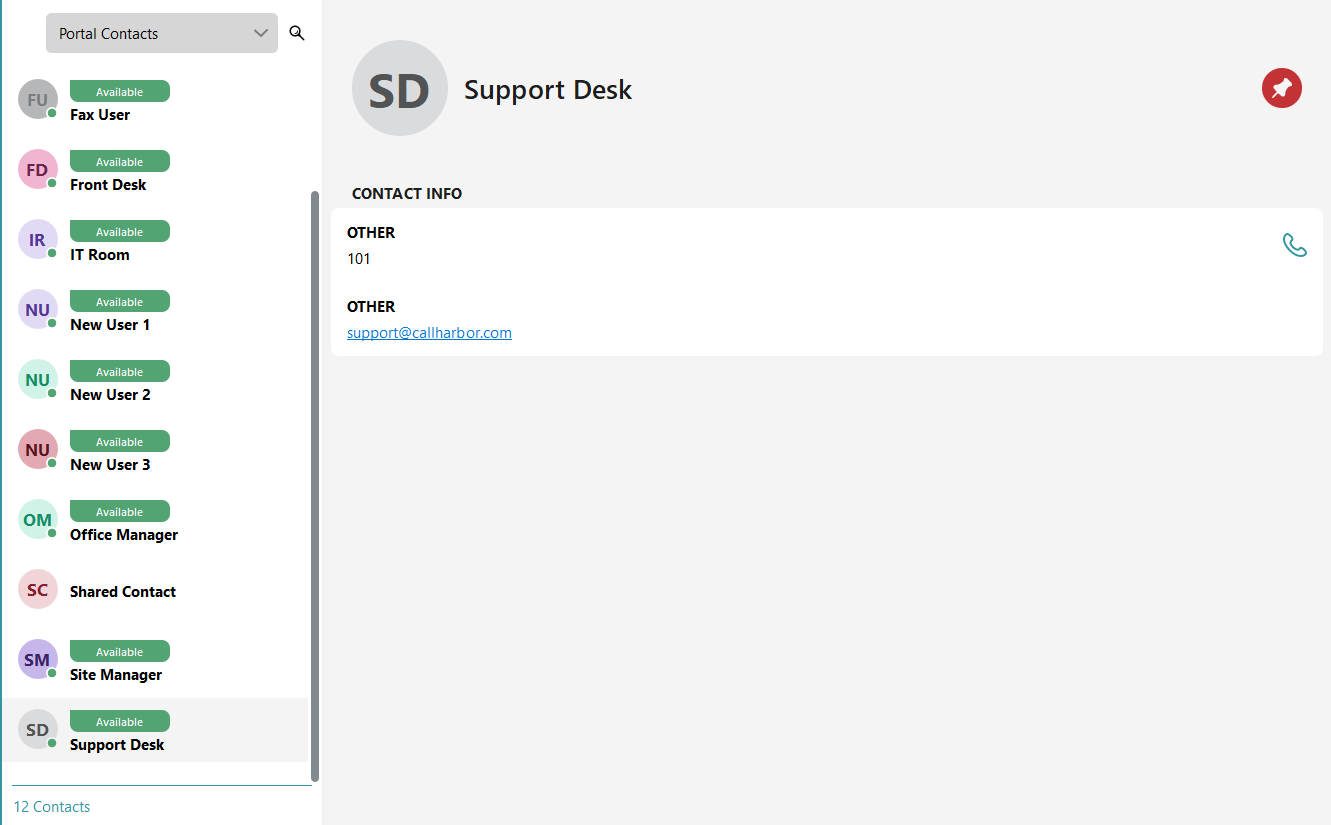
Contacts
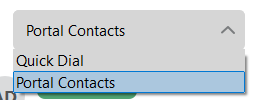
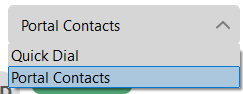
Contacts are separated into two lists: Quick Dial and Portal Contacts. The first time opening the contacts tab, the selection will be defaulted to Quick Dial; however, the application will maintain the selection if updated and the tab is left.
To switch between contact types, select the current selection. A drop-down will open, select the contact type you wish to display
Search Contacts using the Magnifying Glass. Only the contact type selected will be searched.


Clicking a contact will display all information associated with the contact. For Quick Dial, it will display the phone number or extension to be dialed when clicked in the keypad. For Portal Contacts, all information added to the contact will be displayed.
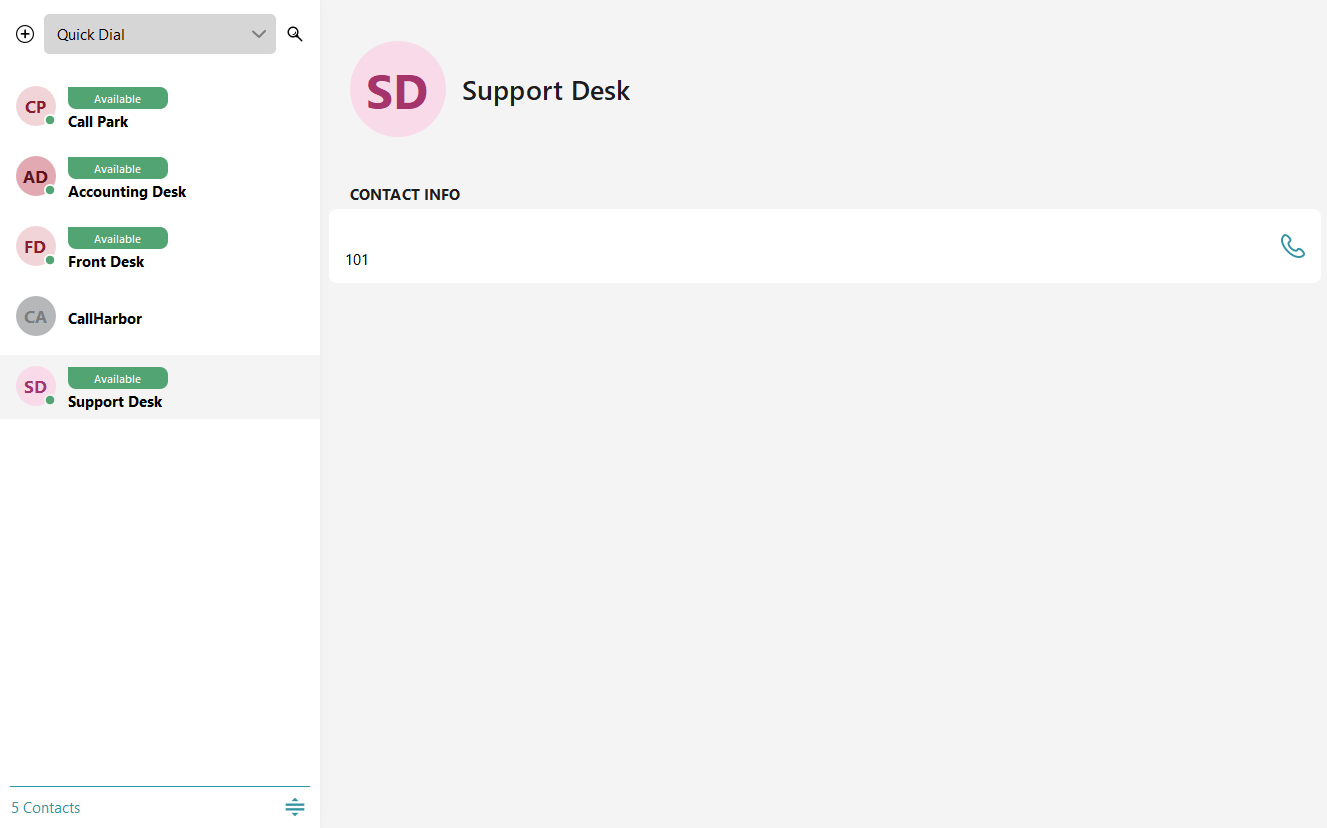
Click the call icon to dial the contact.

Quick Dial Contacts
Quick Dial Contacts are the contacts that have been added or pinned for fast dialing within the Keypad tab.
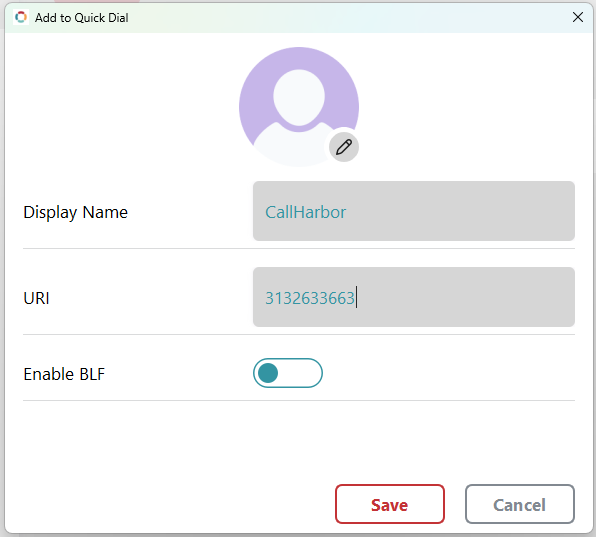
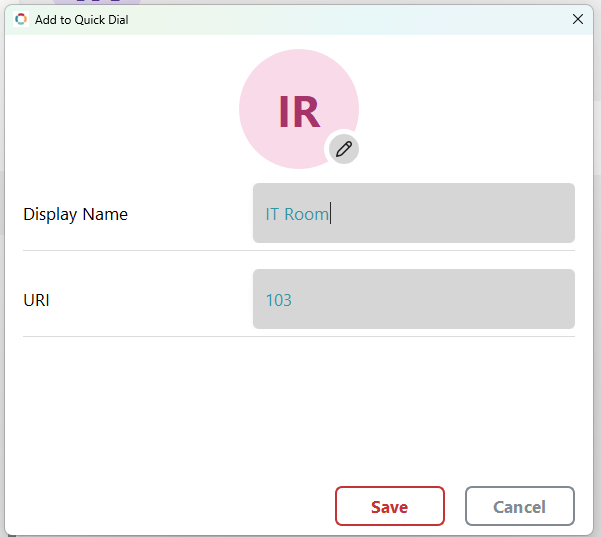
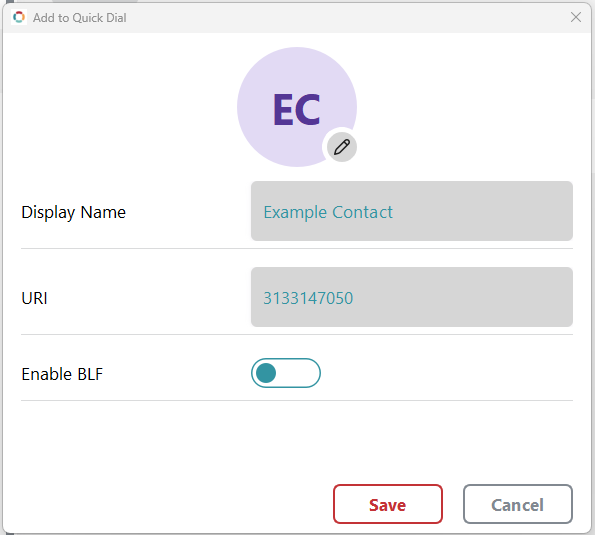
Add a Contact to Quick Dial
1. Click the Plus Icon
2. The Add to Quick Dial window will pop up

3. Enter the contact's name or a label for the quick dial entry in Display Name. Enter the phone number or extension in URI.
- If adding a phone number, 'Enable BLF' should be left unset, as phone numbers cannot be monitored with BLFs, and will always display Available.
- If adding an extension number, 'Enable BLF' will disappear if the application recognizes the extension and will automatically enable BLF. If you are adding an extension that is not recognized by the application, such as a Call Park, click the 'Enable BLF' slider to ensure the call status is displayed.
Pin a Contact to Quick Dial
If you are in the Portal Contacts, you have the option to pin a contact to Quick Dial.
1. Select the Contact to be pinned.

2. Click the Pushpin Icon

3. This opens the Add to Quick Dial window, with the information filled out.
- If the contact is an extension, 'Enable BLF' will not be an option, as BLF is automatically enabled
- If the contact is a phone number, 'Enable BLF' will be displayed; however, leave this unset, as phone numbers cannot be monitored with BLFs, and will always display Available.
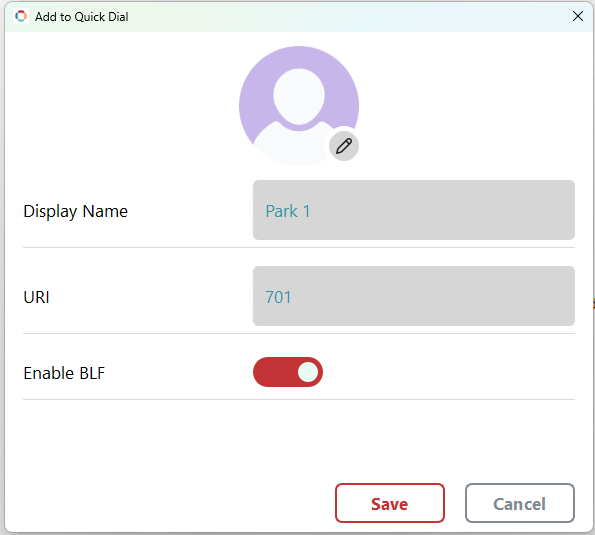
Call Parks
Call Parks can be added to Quick Dial, using the Add a Contact to Quick Dial method. When entering the information, enter Park # (replacing # with the number of the park), the park's extension number, and enable BLF monitoring.
These are the extension numbers usually associated with Call Parks:
Park 1 - 701
Park 2 - 702
Park 2 - 703
However, these may not always be the extensions. To verify the Call Park extensions, please contact CallHarbor Support, including:
- Your Name
- Your Company Name
- Your Extension
- Request a list of Call Park extensions.
Remove Contact from Quick Dial
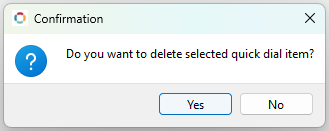
1. Right-click the contact to be removed
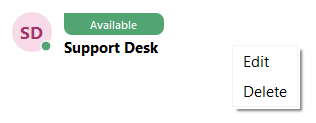
2. Click Delete, and a confirmation window will appear. Click Yes to delete the contact from Quick Dial.
Portal Contacts
Portal Contacts are extensions, contacts added within the portal, and shared contacts. Phone Numbers added in Quick Dial will not show in Portal Contacts, unless the phone number has also been added as a contact within the portal.

Contacts cannot be added to Portal Contacts through the Contacts tab or the Call Log tab at this time. To add a phone number to Portal Contacts, without having to create it as a Quick Dial, the contact must be added using the Portal Tab.
Adding New Contacts to Portal Contacts
1. Click the Portal tab

2. This will open the CallHarbor Portal
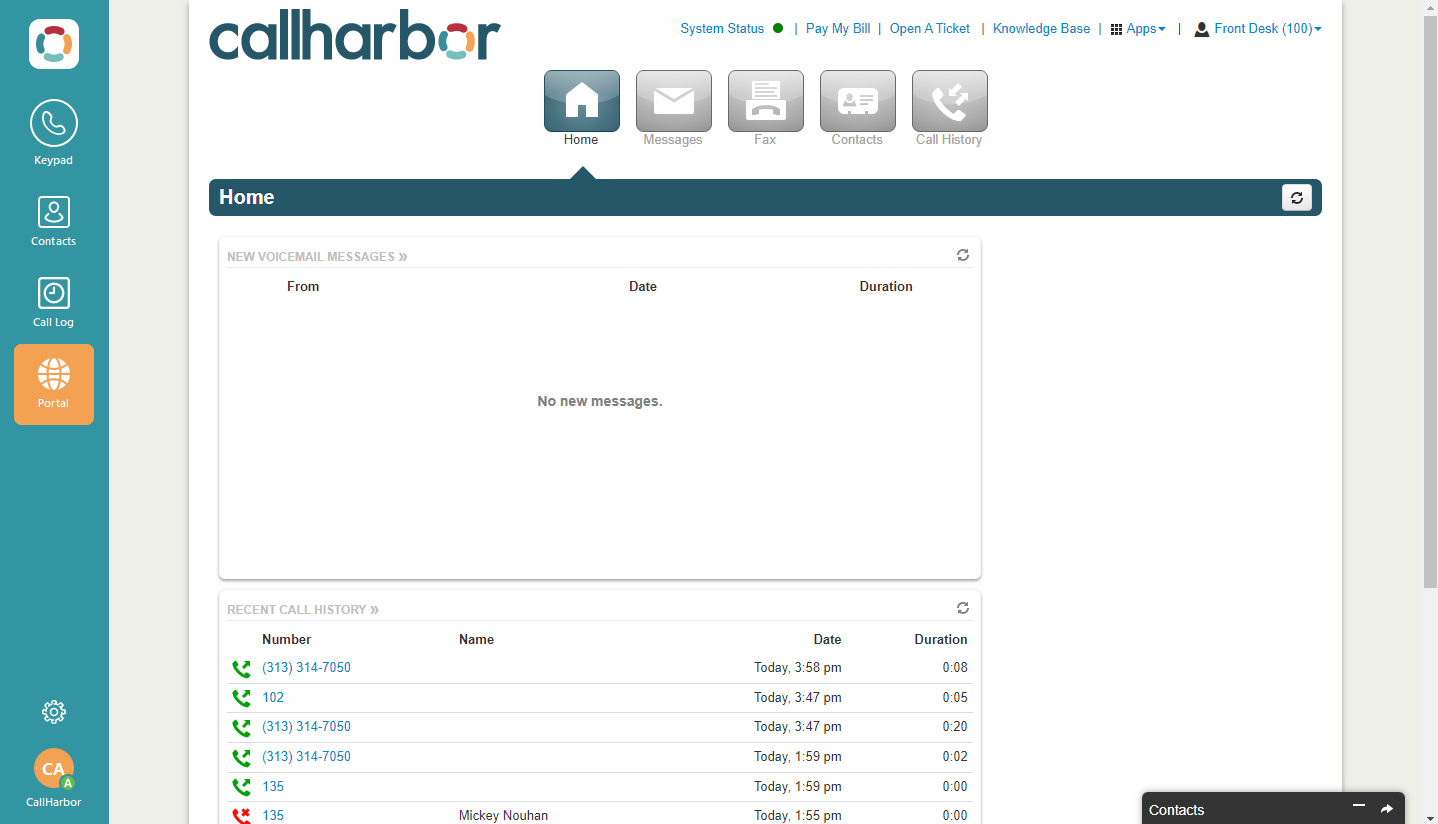
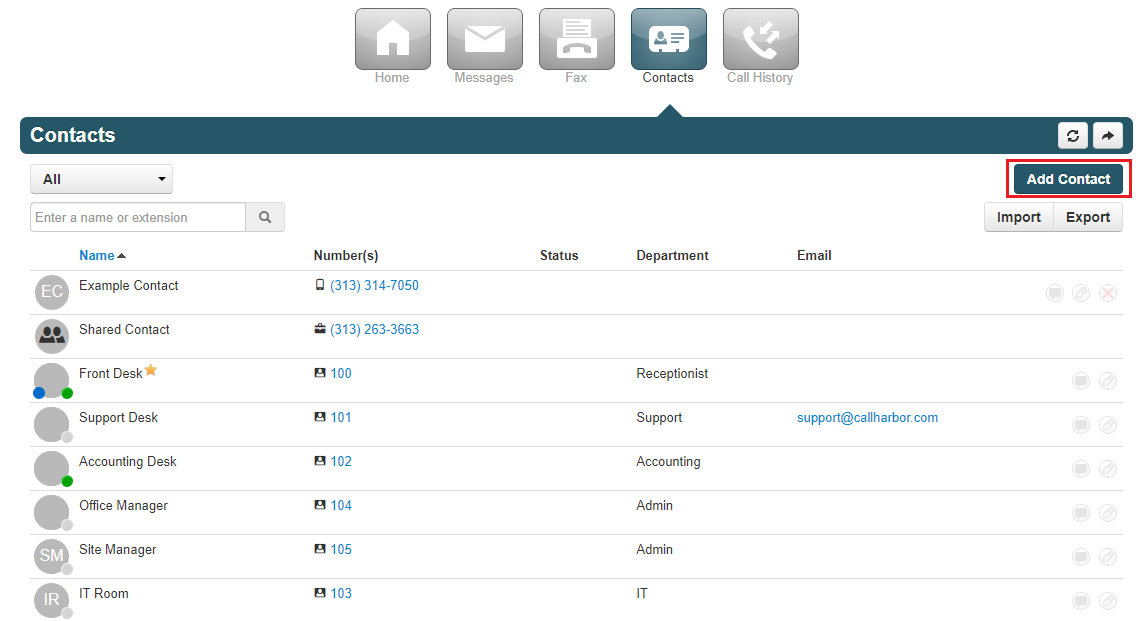
3. Click Contacts

If you are a Call Center Supervisor or higher, you may need to switch the view of the portal from the entire phone system to your extension only. To do this, click on your name in the upper right-hand corner, then select My Account

4. Click Add Contact.
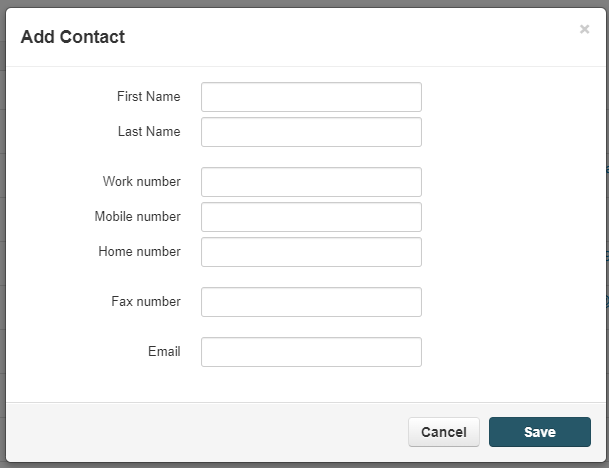
5. The Add Contact window is opened. Enter all necessary information and click Save
6. After all contacts have been added, click the Contacts tab

7. If necessary, switch to Portal Contacts
8. Click and drag down to update the portal contacts
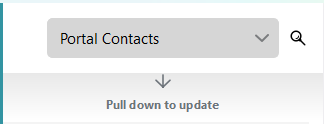
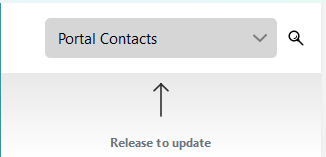
9. All New Contacts added should now appear
Call Log
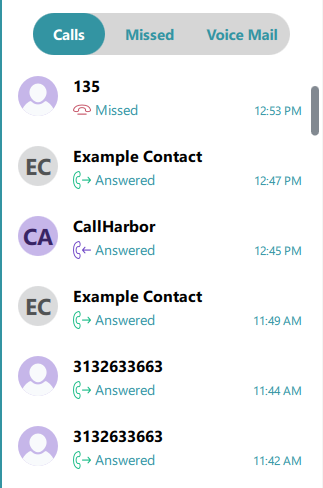
By Default, the Call Log opens to the Calls Tab.
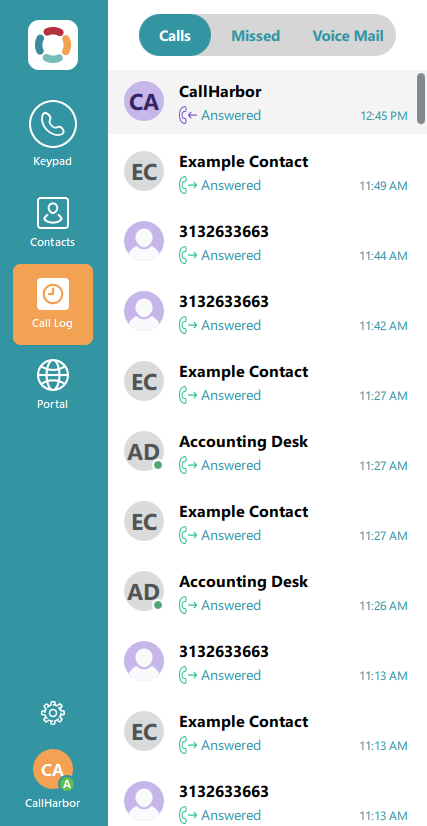
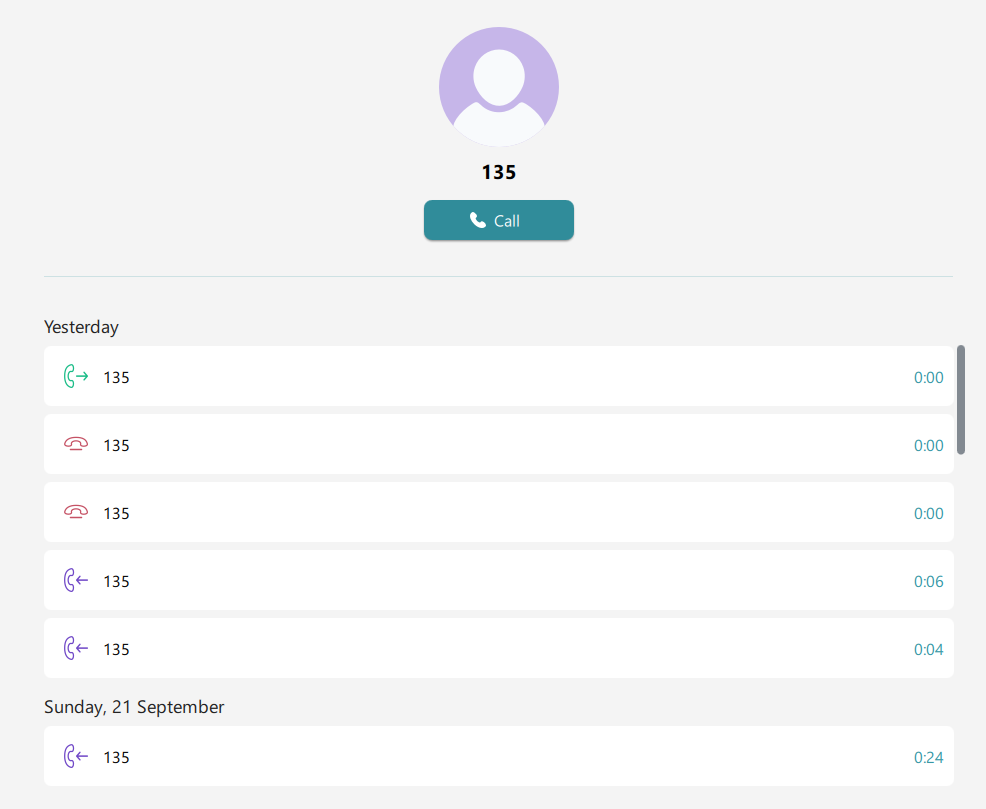
Calls
Calls will list all calls that have occurred: outgoing, incoming, and missed
Incoming Call
![]()
Outgoing Call
![]()
Missed Call
![]()
Clicking on an entry will open additional information about the caller, displaying a Call button for quick redialling, as well as a history of calls.

Missed
Missed will list all missed calls to your extension. Calls coming from a call queue will not leave a missed call if another extension answers the call. If the call is not answered by any extension, a missed call will appear in the history.
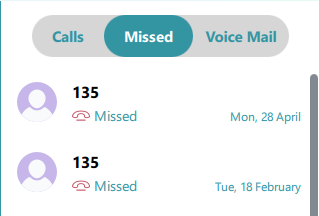
Clicking on an entry will open additional information about the caller, displaying a Call button for quick redialling, as well as a history of calls.
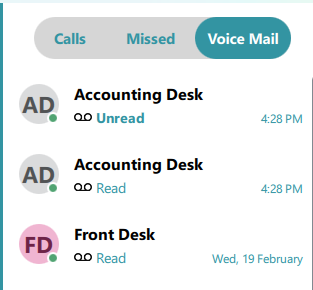
Voice Mail
Voicemail will display all Voicemails in the New and Saved folders.
New Voicemail
![]()
Saved Voicemail
![]()
To listen to a voicemail, click the voicemail entry and then Play. Listening to a voicemail will automatically move the voicemail from New to Saved.

Portal
The Portal tab allows you to access the CallHarbor Portal without having to log in or open your browser.

Each User Scope has different permissions within the portal. Please refer to your User Scope level for further instructions on using the portal.
For Call Center Supervisors, Site Managers, and Office Managers, additional instructions can also be found here.
If you do not know your User Scope level, please contact CallHarbor Support, including:
- Your Name
- Your Company Name
- Your Extension Number
- Request the current user scope level

