
 3359
3359
This article assumes you are logged into the Manager Portal as an Office Manager, or Site Manager.
If you do not know your login name or password, please click here or contact CallHarbor Support.If you need assistance with updating music on hold, please contact CallHarbor Support, including:
- Your Name
- Your Extension
- Your Company Name
- The queue to be updated
- Audio file to be uploaded
Music for music on hold can be downloaded here.
Accessing a Call Queue's MOH
Music
Accessing a Call Queue's MOH
- Select the Call Queues tab

- Locate the queue to upload MOH to and press the Music note icon

- This will switch the portal to the Music On Hold tab, but the queue is selected

- MOH is split into two sections:
Music
Messages
Music

- Click Add Music

- The Add Music window is opened. Music only allows for uploading an audio file

- Click Browse and select the audio file to upload. We recommend using .wav files


- Enter a name in the Song Name text box

- Click Upload. Cancel will disregard the music

Randomize Music
- Once music is uploaded, a Randomize music checkbox appears in the upper right-hand corner of the music section

- Check the box to have the music played in a random order for each caller. If unchecked, the music will play in the order.
Changing Order of Music
- If music is not randomized, the music plays in the order of the files

- To change the order, hold down on the arrows to the left and drag up or down

- A 'You have prioritized your Music On Hold' message will appear across the top. Click Save to save the new order. Cancel will disregard the new order

- After saving, a 'Music on Hold has been reordered' popup message will appear across the top.

Messages
Messages will play periodically while the caller is on hold in the queue. There are two different types of messages:
Introduction Messages - plays on connection of call queue
Messages - play every 15 seconds* while the caller is on hold in the queue
*15 seconds is the default but this can be changed

Adding an Introduction Message
When a caller is connected to the call queue, an introduction message will play. If Require Intro MOH is set to yes for the call queue, the introduction message will play in completion before dispatching to agents.
- Click Add Introduction

If other messages are already added, use the plus arrow on the 'No Introduction added row'

- Select the type:
Text-To-Speech
Upload
Record

Text-To-Speech
- Select Text-To-Speech and type the introduction message in the Message textbox

- Select a voice for the message. We recommend using Jenny or Sara

- Use the Play button to listen to the message before saving

- Once satisfied with the message and voice, press Save. Cancel will disregard the introduction message.

Upload
-
Select Upload

-
Use the Browse button to select the file to upload. We recommend using .wav files


-
Once the file is selected, click Upload. Cancel will disregard the introduction message.

Record
- Select record. By default, your extension number will be entered in Call Me At. Update the Call Me At textbox if needed.

- Once the extension or phone number is entered, press Call. Cancel will disregard the introduction message.
The call will prompt you to start recording then press # once finished.

Please note the call does not repeat the recording or give the option to redo it. When the call is ended, the recording is automatically updated.
Adding a Message
- Click Add Message

- Select the type of message:
Wait Status Update
Text-To-Speech
Upload
Record

Wait Status Updates
- Select Wait Status Updates
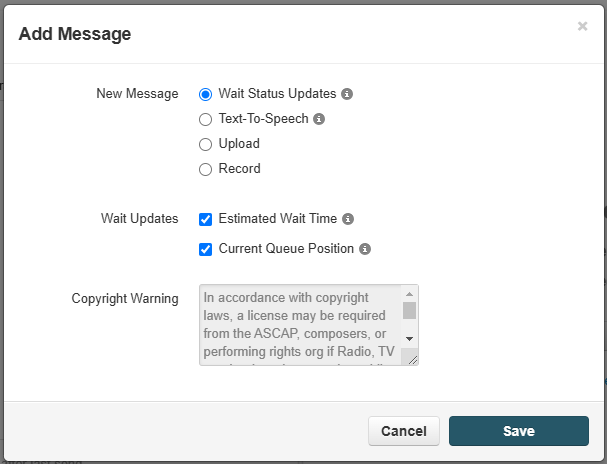
- Select the Wait Updates:
Estimated Wait Time - calculates and announces the estimated remaining wait time for the caller.
Current Queue Position - Announces the current position in the queue for the caller
By default, both are selected - Click Save. Cancel will disregard the message.

- Messages will repeat once they reach the end of all messages uploaded. If you would like the wait message to repeat before the end of all messages uploaded, multiple wait statuses will need to be added to messages

Text-To-Speech
- Select Text-To-Speech and type the message in the Message textbox

- Select a voice for the message. We recommend using Jenny or Sara
- Use the Play button to listen to the message before saving
- Once satisfied with the message and voice, press Save. Cancel will disregard the message.
Upload
- Select Upload
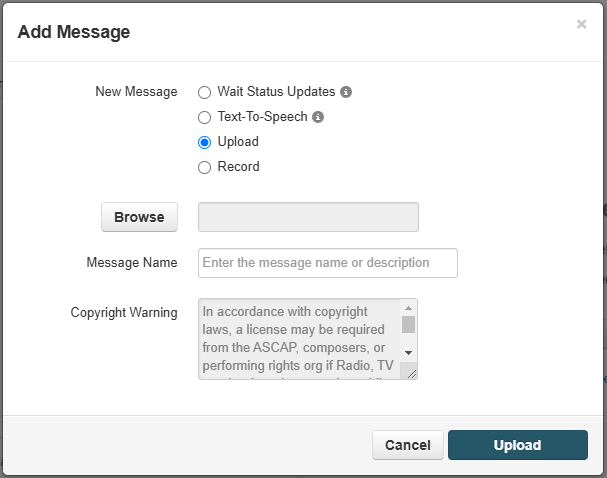
- Use the Browse button to select the file to upload. We recommend using .wav files

- Enter a name in the message name text box, such as Marketing On Hold or Summer Sales

- Click Upload. Cancel will disregard the message.

Record
- Select record. By default, your extension number will be entered in Call Me At. Update the Call Me At textbox if needed.

- Enter a name in the Message Name textbox, such as Marketing On Hold or Summer Sales
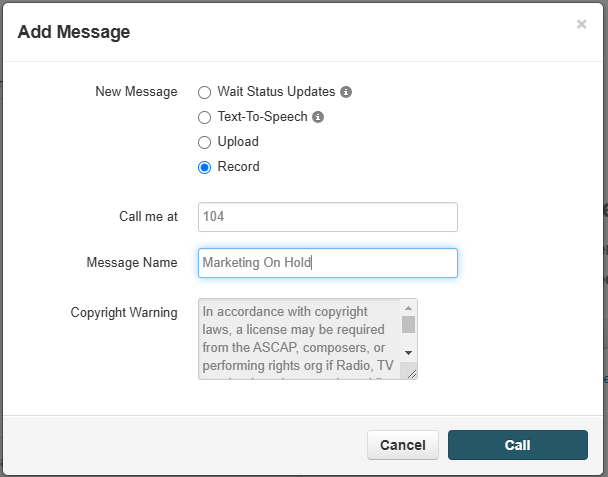
- Once the extension or phone number to call and a message name are entered, press Call. Cancel will disregard the message.
The call will prompt you to start recording, then press # once finished.
Please note the call does not repeat the recording or give the option to redo it. When the call is ended, the recording is automatically updated.
Updating the Time Between Messages
- Once Messages are added, the message side will update to include a timer in the upper right-hand corner.

- Click the timer to update how often the messages are played.

- A slide bar popups

- Move the button up or down to increase or decrease the time. The slider moves in 5-second intervals.

Reorder Messages
- Messages will play in the order of the files.

- To change the order, hold down on the arrows to the left and drag up or down
- A 'You have prioritized your Music On Hold' message will appear across the top. Click Save to save the new order. Cancel will disregard the new order
- After saving, a 'Music on Hold has been reordered' popup message will appear across the top.

