
 3669
3669
Your Extension
This article assumes you are logged into the Manager Portal.
If you do not know your login name or password, please click here or contact CallHarbor Support.
-
Select the Messages icon.

If you are a Call Center Supervisor or higher, you may need to switch the view of the portal from the entire phone system to your extension only. To do this, click on your name in the upper right-hand corner, then select My Account

-
By default, the Messages tab should open to the voicemail sub-tab

-
Click the Settings sub-tab

Enable Voicemail
To enable or disable your voicemail check / uncheck the checkbox next to Enable Voicemail.

Inbox

Options
- Sort voicemail inbox by latest first
- configure your voicemail to play the most recent voicemail message left as the first message you hear. If this option is not enabled, the voicemails will be played in the order they were received
- Announce voicemail received time
- configure your voicemail account to include the time the voicemail was left when checking messages
- Announce incoming call ID
- configure your voicemail to read the caller ID number that left the voicemail
- Send email when mailbox is full
- Enabling this option will send an email when the mailbox data storage limit is met. Default is 25MB
- A full mailbox will prevent any new voicemails to be recorded, so we recommend this option be enabled
- An email address needs to be associated with your extension for this setting to work
- Send email after missed call
- Enabling the Send email after missed call will email you each time you miss a call even if the caller does not leave a voicemail
- An email address needs to be associated with your extension for this setting to work
Copy to Extension(s)
Extensions entered here will receive a copy of all voicemails received by your extension. These are copies of the voicemail; if one is deleted (copy or not), the other will still be available. Use the Plus icon to add additional extensions. Use the X icon to remove extensions. If you are trying to remove the extension in the first textbox, you will need to backspace the extension.

Voicemail Transcription
A transcription of the voicemail will be included in email notifications if Voicemail Transcription is enabled.
If transcription is enabled and the transcriptions are still not available, please contact CallHarbor Support for assistance. Please include:
- Your Name
- Your Extension
- Company Name
Greetings

In the Greetings section, you can:
Select Greeting


Play the currently selected greeting.
Download Selected Greeting

Download a copy of the greeting to your computer.
Manage Greetings

Add, Edit, Delete, or Download greetings

Add Greeting
![]()
Click Add Greeting, then Select Text-To-Speech, Upload, or Record

Text-To-Speech

Enter your voicemail greeting script in the Message text box and select a voice from the Voice Dropdown. We recommend Jenny or Sara.
![]()
Use the play button to listen to the new voicemail greeting. If satisfied with the recording, click Save
Upload

Enter the name to assign to the Greeting in Greeting Name, and select the file using Browse. We recommend a .wav file

After the file is selected, click upload
Record

Add a name to assign to the greeting. By default, your extension will be entered in the Call Me At textbox. The extension or phone number entered will ring after Call is pressed.
When the call connects, you will be asked to start recording after the tone and press # to save.
The call will end after pressing # and the voicemail greeting will be automatically updated.
To listen to the recording, please follow the steps to play selected greeting.
Download Greeting

Download a copy of the greeting to your computer
Edit Greeting

If Text-To-Speech, the script for the recording can be updated:

If uploaded, a new file can replace the current one:

If recorded, a new recording can be created

Play Recorded Name

Play the currently recorded greeting.
Download Recorded Name

Download a copy of the recorded name to your computer.
Manage Recorded Name

Update the recorded name
Select Text-To-Speech, Upload, or Record

Text-To-Speech

Enter your name in the Message text box and select a voice from the Voice Dropdown. We recommend Jenny or Sara.
![]()
Use the play button to listen to the new recorded name. If satisfied with the recording, click Save

Cancel will disregard the changes
Upload

Select a file from your computer to upload to the system. We recommend using a .wav file

After the file is selected, click upload
Record

By default, your extension will be entered in the Call Me At textbox. The extension or phone number entered will ring after Call is pressed.
When the call connects, you will be asked to start recording after the tone and press # to save.
The call will end after pressing # and the recorded name will be automatically updated.
To listen to the recording, please follow the steps to play recorded name.
Notifications

Email Notifications
Enable to receive email notifications for voicemails. To learn more about email notifications, please click here.
Email Type
To learn about the email types available, please click here.
After Email Notification
To learn about the after email notification settings, please click here.
Another Extension
This article assumes you are logged into the Manager Portal as a Site Manager, or Office Manager.
If you do not know your login name or password, please click here or contact CallHarbor Support.
- Select the Users Tab

- Locate the extension to check the voicemails for. You can use the search function to search: Extension Number, First Name, Last Name, Site, or Department

-
Once located, click either the name of the extension or the pencil icon.


-
If name clicked: Switch to the Voicemail sub-tab

If pencil clicked: Select the Voicemail option from the dropdown

Enable Voicemail
To enable or disable voicemail check / uncheck the checkbox next to Enable Voicemail.
Inbox

Options
- Sort voicemail inbox by latest first
- configure the voicemail to play the most recent voicemail message left as the first message heard. If this option is not enabled, the voicemails will be played in the order they were received
- Announce voicemail received time
- configure the voicemail to include the time the voicemail was left when checking messages
- Announce incoming call ID
- configure the voicemail to read the caller ID number that left the voicemail
- Send email when mailbox is full
- Enabling this option will send an email when the mailbox data storage limit is met. Default is 25MB
- A full mailbox will prevent any new voicemails to be recorded, so we recommend this option be enabled
- An email address needs to be associated with the extension for this setting to work
- Send email after missed call
- Enabling the Send email after missed call will email you each time you miss a call even if the caller does not leave a voicemail
- An email address needs to be associated with your extension for this setting to work
Number of Messages
The number of messages, new and saved, that are currently in the voicemail box of the extension.
Copy to Extension(s)
Extensions entered here will receive a copy of all voicemails received by your extension. These are copies of the voicemail; if one is deleted (copy or not), the other will still be available. Use the Plus icon to add additional extensions. Use the X icon to remove extensions. If you are trying to remove the extension in the first textbox, you will need to backspace the extension.
Voicemail Transcription
A transcription of the voicemail will be included in email notifications if Voicemail Transcription is enabled.
If transcription is enabled and the transcriptions are still not available, please contact CallHarbor Support for assistance. Please include:
- Your Name
- Your Extension
- Company Name
- The voicemail box with transcription issues
Data
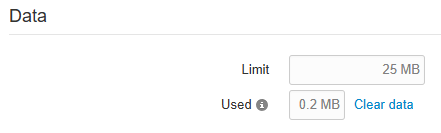
In the Data section of the user voicemail tab, you can see the user's data limit and the amount currently used. The data can be cleared using the Clear Data button; please note that User data includes all voicemails, music on hold, and greetings.
Greetings
In the Greetings section, you can:
Select Greeting
Select the greeting to be used by the voicemail box.
Play the currently selected greeting.
Download Selected Greeting
Download a copy of the greeting to your computer.
Manage Greetings
Add, Edit, Delete, or Download greetings
Add Greeting
![]()
Click Add Greeting, then Select Text-To-Speech, Upload, or Record
Text-To-Speech
Enter the voicemail greeting script in the Message text box and select a voice from the Voice Dropdown. We recommend Jenny or Sara.
![]()
Use the play button to listen to the new voicemail greeting. If satisfied with the recording, click Save
Upload
Enter the name to assign to the Greeting in Greeting Name, and select the file using Browse. We recommend a .wav file
After the file is selected, click upload
Record
Add a name to assign to the greeting. By default, your extension will be entered in the Call Me At textbox. The extension or phone number entered will ring after Call is pressed.
When the call connects, you will be asked to start recording after the tone and press # to save.
The call will end after pressing # and the voicemail greeting will be automatically updated.
To listen to the recording, please follow the steps to play selected greeting.
Download Greeting
Download a copy of the greeting to your computer
Edit Greeting
If Text-To-Speech, the script for the recording can be updated:
If uploaded, a new file can replace the current one:
If recorded, a new recording can be created
Play Recorded Name
Play the currently recorded greeting.
Download Recorded Name
Download a copy of the recorded name to your computer.
Manage Recorded Name
Update the recorded name
Select Text-To-Speech, Upload, or Record
Text-To-Speech
Enter your name in the Message text box and select a voice from the Voice Dropdown. We recommend Jenny or Sara.
![]()
Use the play button to listen to the new recorded name. If satisfied with the recording, click Save
Cancel will disregard the changes
Upload
Select a file from your computer to upload to the system. We recommend using a .wav file
After the file is selected, click upload
Record
By default, your extension will be entered in the Call Me At textbox. The extension or phone number entered will ring after Call is pressed.
When the call connects, you will be asked to start recording after the tone and press # to save.
The call will end after pressing # and the recorded name will be automatically updated.
To listen to the recording, please follow the steps to play recorded name.
Notifications

Email Notifications
Enable to receive email notifications for voicemails. To learn more about email notifications, please click here.
Email Type
To learn about the email types available, please click here.
After Email Notification
To learn about the after email notification settings, please click here.

